Lensrentals.com is a highly respected company that rents photography and videography equipment. We’re a fan of their blog and asked Zach Sutton and Ryan Hill of Lensrentals to contribute something for our audience. We also contributed a post to their blog that was posted today: 3-2-1 Backup Best Practices using Cloud Archiving.
You can read all posts on our blog in this series at Lensrentals post series.
Enjoy!
— Editor
At Lensrentals.com we get a number of support calls, but unfortunately one of them is among the most common: data catastrophes.
The first of the frequent calls is from someone who thought they transferred over their footage or photos before returning their rental and discovered later that they were missing some images or footage. If we haven’t already gone through an inspection of those cards, it’s usually not a problem to send the cards back to them so they can collect their data. But if our techs have inspected the memory cards, then there isn’t much we can do. Our team at Lensrentals.com perform a full and secure reformatting of the cards to keep each customer’s data safe from the next renter. Once that footage is gone, it is unrecoverable and gone forever. This is never a fun conversation to have.
The second scenario is when a customer calls to tell us that they did manage to transfer all the footage over, but one or more of the clips or images were corrupted in the transferring process. Typically, people don’t discover this until after they’ve sent back the memory cards, and after we’ve already formatted the original media. This is another tough phone call to have. On occasion, data corruption happens in camera, but more often than not, the file gets corrupted during the transfer from the media to the computer or hard drive.
These kinds of problems aren’t entirely avoidable and are inherent risks users take when working with digital media. However, as with all risks, you can take proper steps to assure that your data is safe. If a problem arises, there are techniques you can use to work around it.
We’ve summarized our best suggestions for protecting your data from camera to archive in the following sections. We hope you find them useful.
How to Protect Your Digital Assets
Before Your Shoot
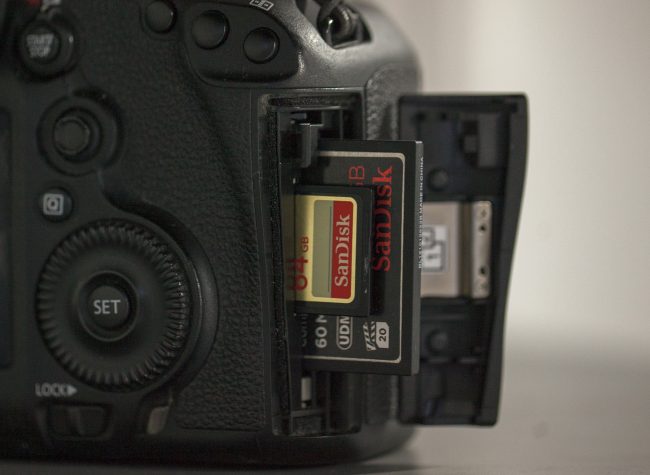
The first and most obvious step to take to assure your data is safe is to make sure you use reliable media. For us, we recommend using cards from brands you trust, such as Sandisk, Lexar or ProGrade Digital (a company that took the reins from Lexar). For hard drives, SanDisk, Samsung, Western Digital, and Intel are all considered incredibly reliable. These brands may be more expensive than bargain brands but have been proven time and time again to be more reliable. The few extra dollars spent on reliable media will potentially save you thousands in the long run and will assure that your data is safe and free of corruption.
One of the most important things you should do before any shoot is format your memory card in the camera. Formatting in camera is a great way to minimize file corruption as it keeps the card’s file structure conforming to that camera manufacturer’s specifications, and it should be done every time before every shoot. Equally important, if the camera gives you an option to do a complete or secure format, take that option over the other low-level formatting options available. In the same vein, it’s essential to also take the time to research and see if your camera needs to unmount or “eject” the media before removing it physically. While this option applies more for video camera recording systems, like those found on the RED camera platform and the Odyssey 7Q, it’s always worth checking into to avoid any corruption of the data. More often than not, preventable data corruption happens when the users turn off the camera system before the media has been unmounted.
Finally, if you’re shooting for the entire day, you’ll want to make sure you have enough media on hand for the entire day, so that you do not need to back up and reformat cards throughout the shoot. While it’s possible to take footage off of the card, reformat it, and use it again for the same day, that is not something you’d want to be doing during the hectic environment of a shoot day — it’s best to have extra media on hand. We’ve all made a mistake and deleted a file we didn’t mean to, so it’s best to avoid that mistake by not having to delete or manage files while shooting. Play it safe, and only reformat when you have the time and clear head to do so.
During Your Shoot
On many modern camera systems, you have the option of dual-recording using two different card slots. If your camera offers this option, we cannot recommend it enough. Doubling the media you’re recording onto can overcome a failure in one of the memory cards. While the added cost may be a hard sell, it’s negligible when compared to all the money spent on lights, cameras, actors and lousy pizza for the day. Additionally, develop a system that works for you and keeps everything as organized as possible. Spent media shouldn’t be in the same location as unused media, and your file structure should be consistent throughout the entire shoot. A proper file structure not only saves time but assures that none of the footage goes missing after the shoot, lost in some random folder.
Among one of the most critical jobs while on set is the work of a DIT (Digital Imaging Technician) for video, and a DT (Digital Technician) for photography. Essentially, the responsibilities of these positions are to keep the data archived and organized on a set, as well as metadata logging and other technical tasks involved in keeping a shoot organized. While it may not be cost effective to have a DIT/DT on every shoot, if the budget allows for it, I highly recommend you hire one to take on the responsibilities. Having someone on set who is solely responsible for safely backing up and organizing footage helps keep the rest of the crew focused on their obligations to assure nothing goes wrong. When they’re not transferring and archiving data, DIT/DT’s also log metadata, color correct footage and help with the other preliminary editing processes. Even if the budget doesn’t allow for this position to be filled, work to find someone who can solely handle these processes while on set. You don’t want your camera operator to be in charge of also backing up and organizing footage if you can help it.
Ingest Software
If there is one piece of information we’d like for videographers and photographers to take away from this article, it is this: file-moving or ‘offloading’ software is worth the investment and should be used every time you shoot anything. For those who are unfamiliar with offload software, it’s any application that is designed to make it easier for you to back up footage from one location to another, and one shoot to another. In short, to avoid accidents or data corruption, it’s always best to have your media on a MINIMUM of two different devices. The easiest way to do this is to simply dump media onto two separate hard drives, and keep those drives separately stored. Ideally (if the budget allows), you’ll also keep all of your data on the original media for the day as well, making sure you have multiple copies stored in various locations. Many other options are available and recommended if possible, such as RAID arrays or even copying the data over to a cloud service such as Backblaze B2. What offloading software does is just this process, and helps build a platform of automation while verifying all the data as it’s transferred.
There are a few different recommendations I give for offloading software, all at different price points and with unique features. At the highest end of video production, you’ll often see DITs using a piece of software called Silverstack, which offers color grading functionalities, LTO tape support, and basic editing tools for creating daily edits. At a $600 annual price, it is the most expensive in this field and is probably overkill for most users. As for my recommendation, I recommend a tool call Shotput Pro. At $129, Shotput Pro offers all the tools you’d need to build a great archiving process while sacrificing some of the color editing tools. Shotput Pro can simultaneously copy and transfer files to multiple locations, build PDF reports, and verify all transfers. If you’re looking for something even cheaper, there are additional options such as Offload and Hedge. They’re both available for $99 each and give all the tools you’d need within their simple interfaces.
When it comes to photo, the two most obvious choices are Adobe Lightroom and Capture One Pro. While both tools are known more for their editing tools, they also have a lot of archiving functions built into their ingest systems, allowing you to unload cards to multiple locations and make copies on the fly.

When it comes to video, the most crucial feature all of the apps should have is an option called “checksum verification.” This subject can get complicated, but all you really need to know is that larger files are more likely to be corrupted when transferring and copying, so what checksum verification does is verify the file to assure that it’s identical to the original version down to the individual byte. It is by far the most reliable and effective way to ensure that entire volumes of data are copied without corruption or loss of data. Whichever application you choose, make sure checksum verification is an available feature, and part of your workflow every time you’re copying video files. While available on select photo ingesting software, corruption happens less on smaller files and is generally less of an issue. Still, if possible, use it.
Post-Production
Once you’ve completed your shoot and all of your data is safely transfered over to external drives, it’s time to look at how you can store your information long term. Different people approach archiving in different ways because none of us will have an identical workflow. There is no correct way to handle how to archive your photos and videos, but there are a few rules that you’ll want to implement.
The first rule is the most obvious. You’ll want to make sure your media is stored on multiple drives. That way, if one of your drives dies on you, you still have a backup version of the work ready to go. The second rule of thumb is that you’ll want to store these backups in different locations. This can be extremely important if there is a fire in your office, or you’re a victim of a robbery. The most obvious way to do this is to back up or archive into a cloud service such as Backblaze B2. In my production experience I’ve seen multiple production houses implement a system where they store their backup hard drives in a safety deposit box at their bank. The final rule of thumb is especially important when you’re working with significant amounts of data, and that is to keep a working drive separate from an archive drive. The reason for this is an obvious one: all hard drives have a life expectancy, and you can prolong that by minimizing drive use. Having a working drive separate from your archive drives means that your archive drives will have fewer hours on them, thereby extending their practical life.
Ryan Hill’s Workflow
To help visualize what we discussed above, I’ll lay out my personal workflow for you. Please keep in mind that I’m mainly a one-man band, so my workflow is based on me handling everything. I’m also working with a large variety of mediums, so nothing I’m doing is going to be video and camera specific as all of my video projects, photo projects, and graphic projects are organized in the same way. I won’t bore you with details on my file structure, except to say that everything in my root folder is organized by job number, followed by sub-folders with the data classified into categories. I will keep track of which jobs are which, and have a Google Spreadsheet that organizes the job numbers with descriptions and client information. All of this information is secured within my Google account but also allows me to access it from anywhere if needed.
With archiving, my system is pretty simple. I’ve got a 4-drive RAID array in my office that gets updated every time I’m working on a new project. The array is set to RAID 1+0, which means I could lose two of the four hard drives, and still be able to recover the data. Usually, I’ll put 1TB drives in each bay, fill them as I work on projects, and replace them when they’re full. Once they’re full, I label them with the corresponding job numbers and store them in a plastic case on my bookshelf. By no means am I suggesting that my system is a perfect system, but for me, it’s incredibly adaptable to the various projects I work on. In case I was to get robbed, or if my house caught fire, I still have all of my work also archived onto a cloud system, giving me a second level of security.
Finally, to finish up my backup solution, I also keep a two-bay Thunderbolt hard drive dock on my desk as my working drive system. Solid state drives (SSD) and the Thunderbolt connection give me the speed and reliability that I’d need from a drive that I’ll be working from, and rendering outputs off of. For now, there is a single 960gb SSD in the first bay, with the option to extend to the second bay if I need additional storage. I start work by transferring the job file from my archive to the working drive, do whatever I need to do to the files, then replace the old job folder on my archive with the updated one at the end of the day. This way, if I were to have a drive failure, the worst I will lose is a day’s worth of work. For video projects or anything that takes a lot of data, I usually keep copies of all my source files on both my working and archive drive, and just replace the Adobe Premiere project file as I go. Again, this is just my system that works for me, and I recommend you develop one that works for your workflow while keeping your data safe.
The Takeaway
The critical point you should take away is that these sorts of strategies are things you should be thinking about at every step of your production. How does your camera or codec choice affect your media needs? How are you going to ensure safe data backup in the field? How are you going to work with all of this footage in post-production in a way that’s both secure and efficient? Answering all of these questions ahead of time will keep your media safe and your clients happy.
— Zach Sutton and Ryan Hill, lensrentals.com