Network attached storage (NAS) devices offer centralized data storage solutions, enabling users to easily protect and access their data locally. You can think of a NAS device as a powerful computer that doesn’t have a display or keyboard. NAS can function as extended hard disks, virtual file cabinets, or centralized storage systems depending on individual needs. While NAS devices provide local data protection, a hybrid setup with cloud storage offers off-site protection by storing files on geographically remote servers.
This blog is the first in a two part series that will focus on home NAS setups, exploring how two Backblazers set up their NAS devices and connected them to the cloud. We’ll aim to present actionable setup tips and explain what each of our data storage needs are so that you can create your own NAS setup strategy.
I’m Vinodh, your first user. In this post, I will walk you through how I use a Synology Single-Bay NAS device and Backblaze B2 Cloud Storage.
Why Did I Need a NAS Device At My Home?
Before I share my NAS setup, let’s take a look at some of the reasons why I needed a NAS device to begin with. Knowing that will give you a better understanding of what I’m trying to accomplish with NAS.
My work at Backblaze involves guiding customers through all things NAS and cloud storage. I use a single-bay NAS device to understand its features and performance. I also create demos, test use cases, and develop marketing materials and back them up on my NAS and in the cloud to achieve the requirements of a 3-2-1 backup strategy. That strategy recommends that you have three copies of data stored in two different locations with one copy off-site.
Additionally, I use my NAS setup to off-load the (stunning!) photos and videos from my wife’s and my iPhones to free up space and protect them safely in the cloud. Lastly, I’d also like to mention that I work remotely and collaborate with people as part of my regular work, but today we’re going to talk about how I back up my files using a hybrid cloud storage setup that combines Synology NAS and Backblaze B2. Combining NAS and cloud storage is a great backup and storage solution for both business and personal use, providing a layer of protection in the event of hardware failures, accidental deletions, natural disasters, or ransomware attacks.
Now that you understand a little bit about me and what I’m trying to accomplish with my NAS device, let’s jump into my setup.
What Do I Need From My NAS Device?
Needless to say, there are multiple ways to set up a NAS device. But, the most common setup is for backing up your local devices (computer, phones, etc.) to your NAS device. A basic setup like this, with a few computers and devices backing up to the same NAS device, protects data in that you have a second copy of your data stored locally. However, the data can still be lost if there is hardware failure, theft, fire, or any other unexpected event that poses a threat to your home. This means that your backup strategy needs something more in order to truly protect your data.
Off-site protection with cloud storage solves this problem. So, when I planned my NAS setup, I wanted to make sure I had a NAS device that integrates well with a cloud storage provider to achieve a 3-2-1 backup strategy.
Now that we’ve talked about my underlying data protection strategy, here are the devices and tools I used to create a complete 3-2-1 NAS backup setup at my home:
- Devices with data:
- MacBook Pro–1
- iPhone–2
- Storage products:
- Synology Device–1
- Seagate 4TB internal hard disk drive–1
- Backblaze B2 Cloud Storage
- Applications:
- Synology Hyper Backup
- Synology Photos
What Did I Want to Back Up on My NAS Device?
My MacBook Pro is where I create test use cases, demos, and all the files I need to do my job, such as blog posts, briefs, presentation decks, ebooks, battle cards, and so on. In addition to creating files, I also download webinars, infographics, industry reports, video guides, and any other information that I find useful to support our sales and marketing efforts. As I mentioned previously, I want to protect this business data both locally (for quick access) and in the cloud (for off-site protection). This way, I can not only secure the files, but also remotely collaborate with people from different locations so everyone can access, review, and edit the files simultaneously to ensure timely and consistent messaging.
Meanwhile, my wife and I each have an iPhone 12 with 128GB storage space. Clearly, a total of 256GB is not enough for us—it only takes six to nine months for us to run out of storage on our devices. Once in a while, I clean up the storage space to make sure my phone runs at optimal speed by removing any duplicate or unwanted photos or movies. However, my wife doesn’t like to delete anything as she often wants to look back and remember that one time we went to that one place with those friends. But, she has hundreds of pictures of that one place with those friends. As a result, our iPhone family usage is almost always at capacity.
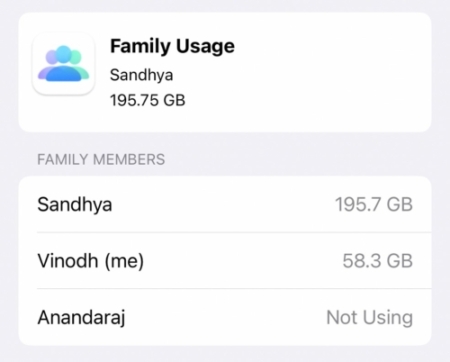
As you can see, being able to off-load pictures and movies from our phones to a local device would give us quick access, protect our memories in the cloud, and free up our iPhone storage.
How I Set Up My NAS Device
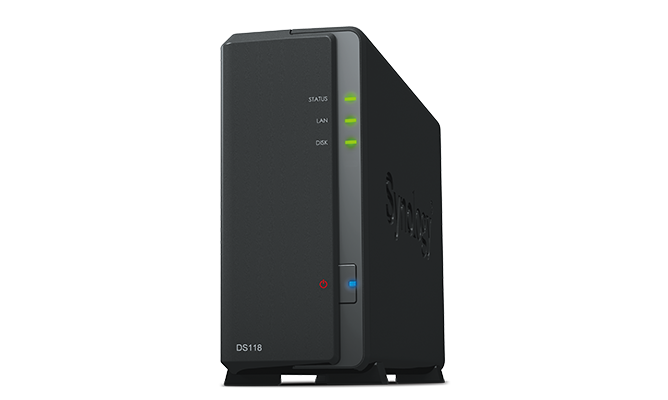
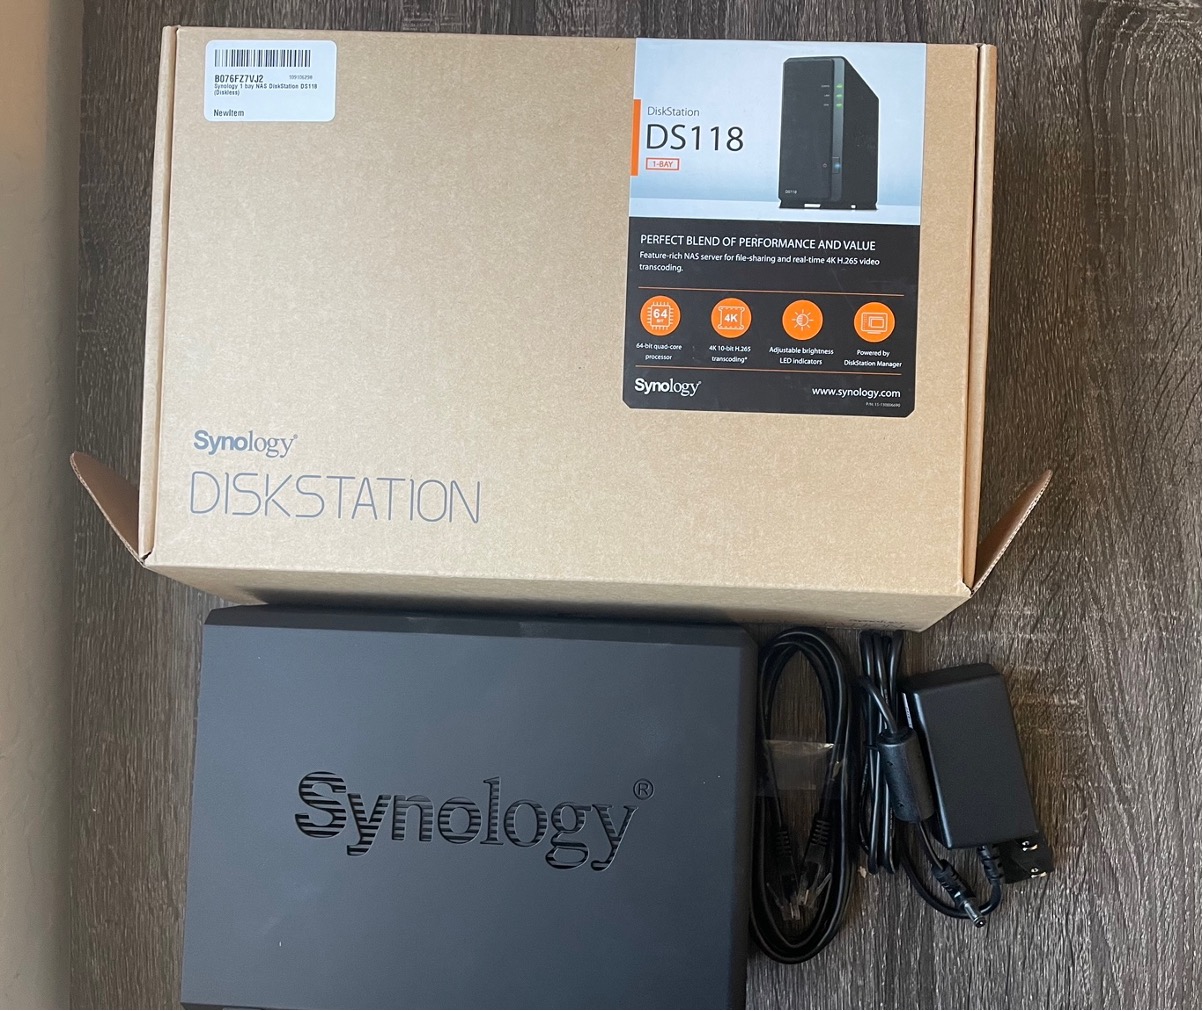
To accomplish all that, I set up a Synology Single-Bay NAS Diskstation (Model: DS118) which is powered by a 64-bit quad-core processor and 1GB DDR4 memory. As we discussed above, a NAS device is basically a computer without a display and keyboard.
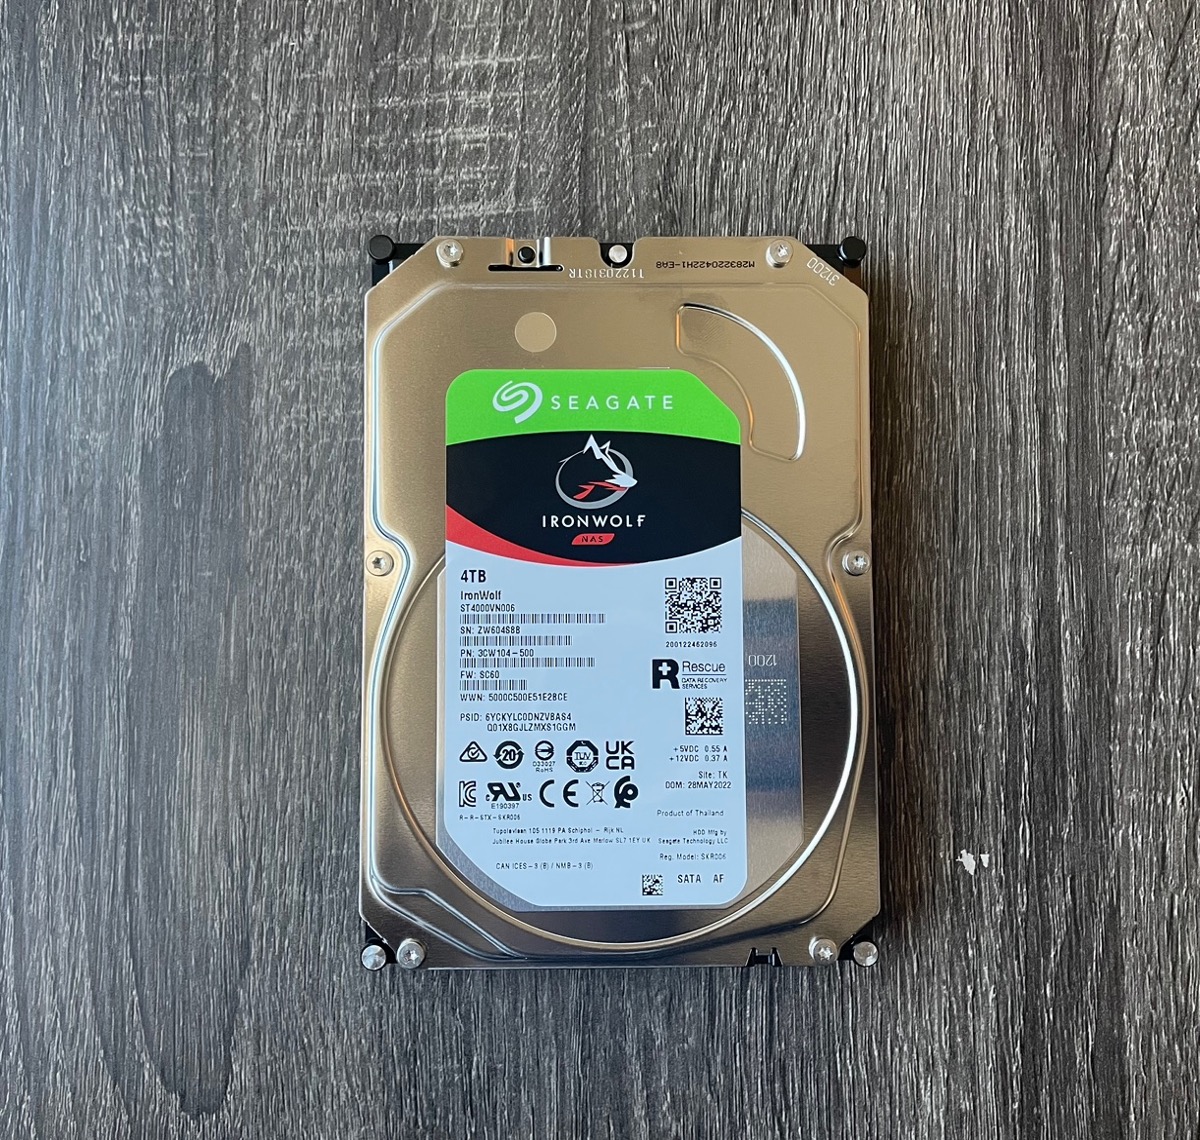
Most NAS devices are diskless, meaning we’d need to buy hard disk drives (HDD) and install them on the NAS device. Also, it is important to note that NAS devices work differently than a typical computer. A NAS device is always running even if you turn off your computer or laptop. A regular hard disk drive may not support this operating pressure. Therefore, it’s essential that we get NAS drives that are suitable for NAS devices. For my NAS device, I got a 4TB HDD from Seagate. You can look up compatible drives on Synology’s compatibility list. When you buy your NAS, the manufacturer should give you a list of which hard drives are compatible, and you can always check out Drive Stats if you want to read up on how long drives last.
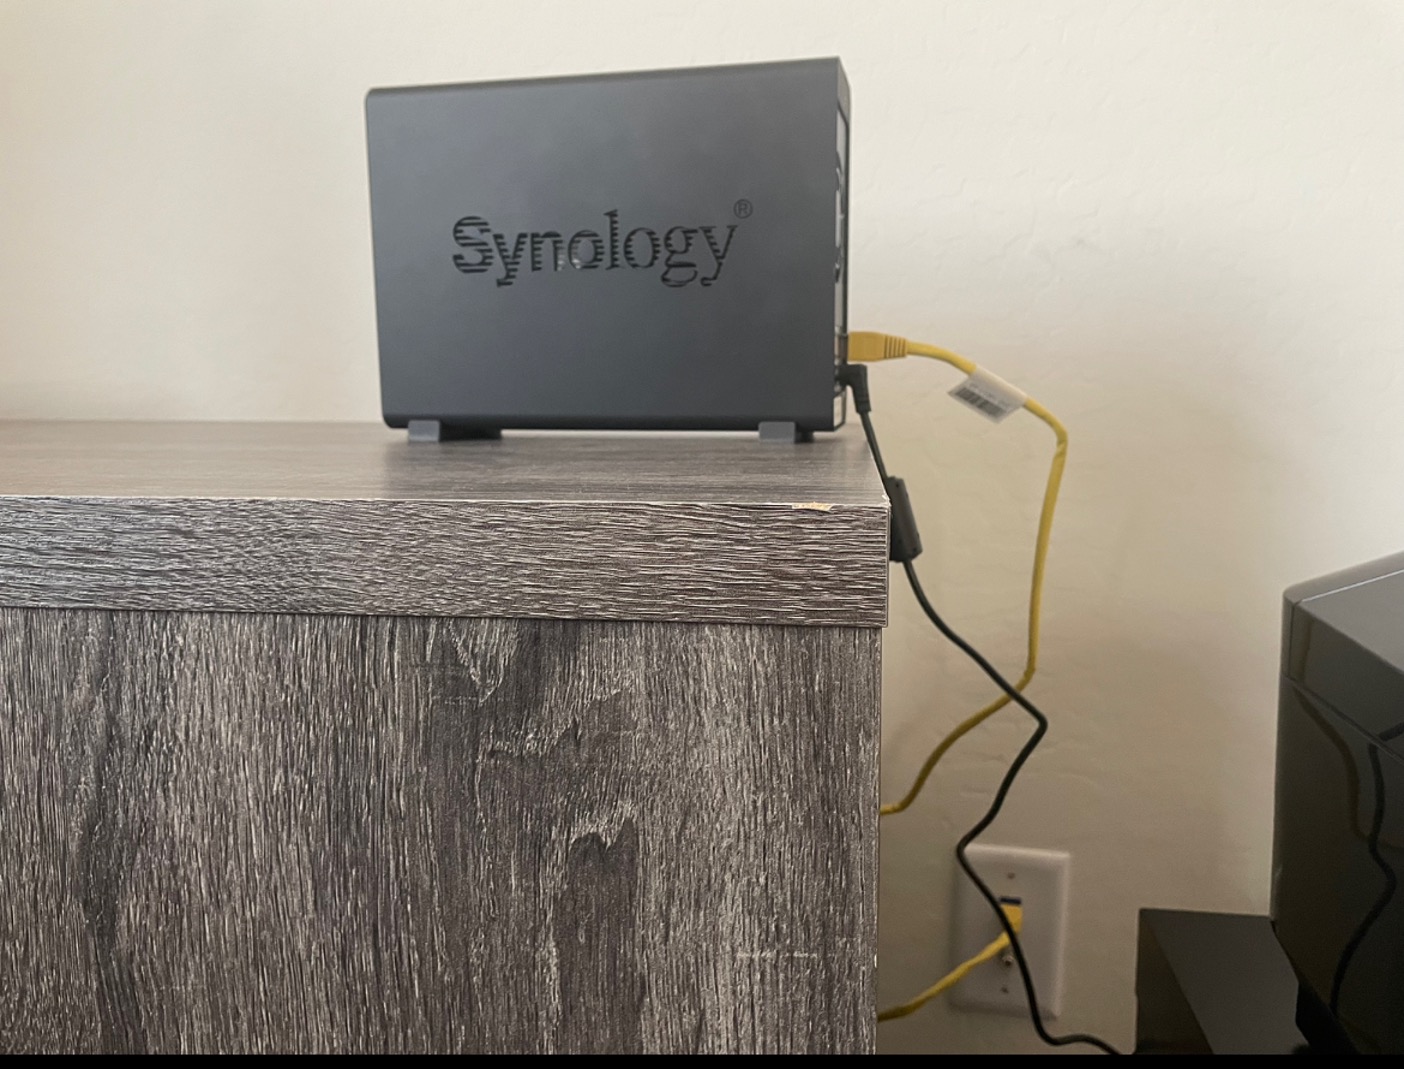
After getting the NAS device and HDD, the next item I wanted to figure out is where to keep it. NAS devices typically plug into routers rather than desktops or laptops. With help from my internet service provider, I was able to connect all rooms in our house with an ethernet connection that’s attached to the router. For now, I set up the NAS device in my home office on a spare desk connected to the router via an RJ45 cable.
In addition to protecting data locally on the NAS device, I also use B2 Cloud Storage for off-site protection. Every NAS has its own software that helps you set up how your backups occur from your personal devices to your NAS, and that software will also have a way to back up to the cloud. On a Synology NAS, that software is called Hyper Backup, and we’ll talk a little bit more about it below.
How I Back Up My Computer to My NAS Device
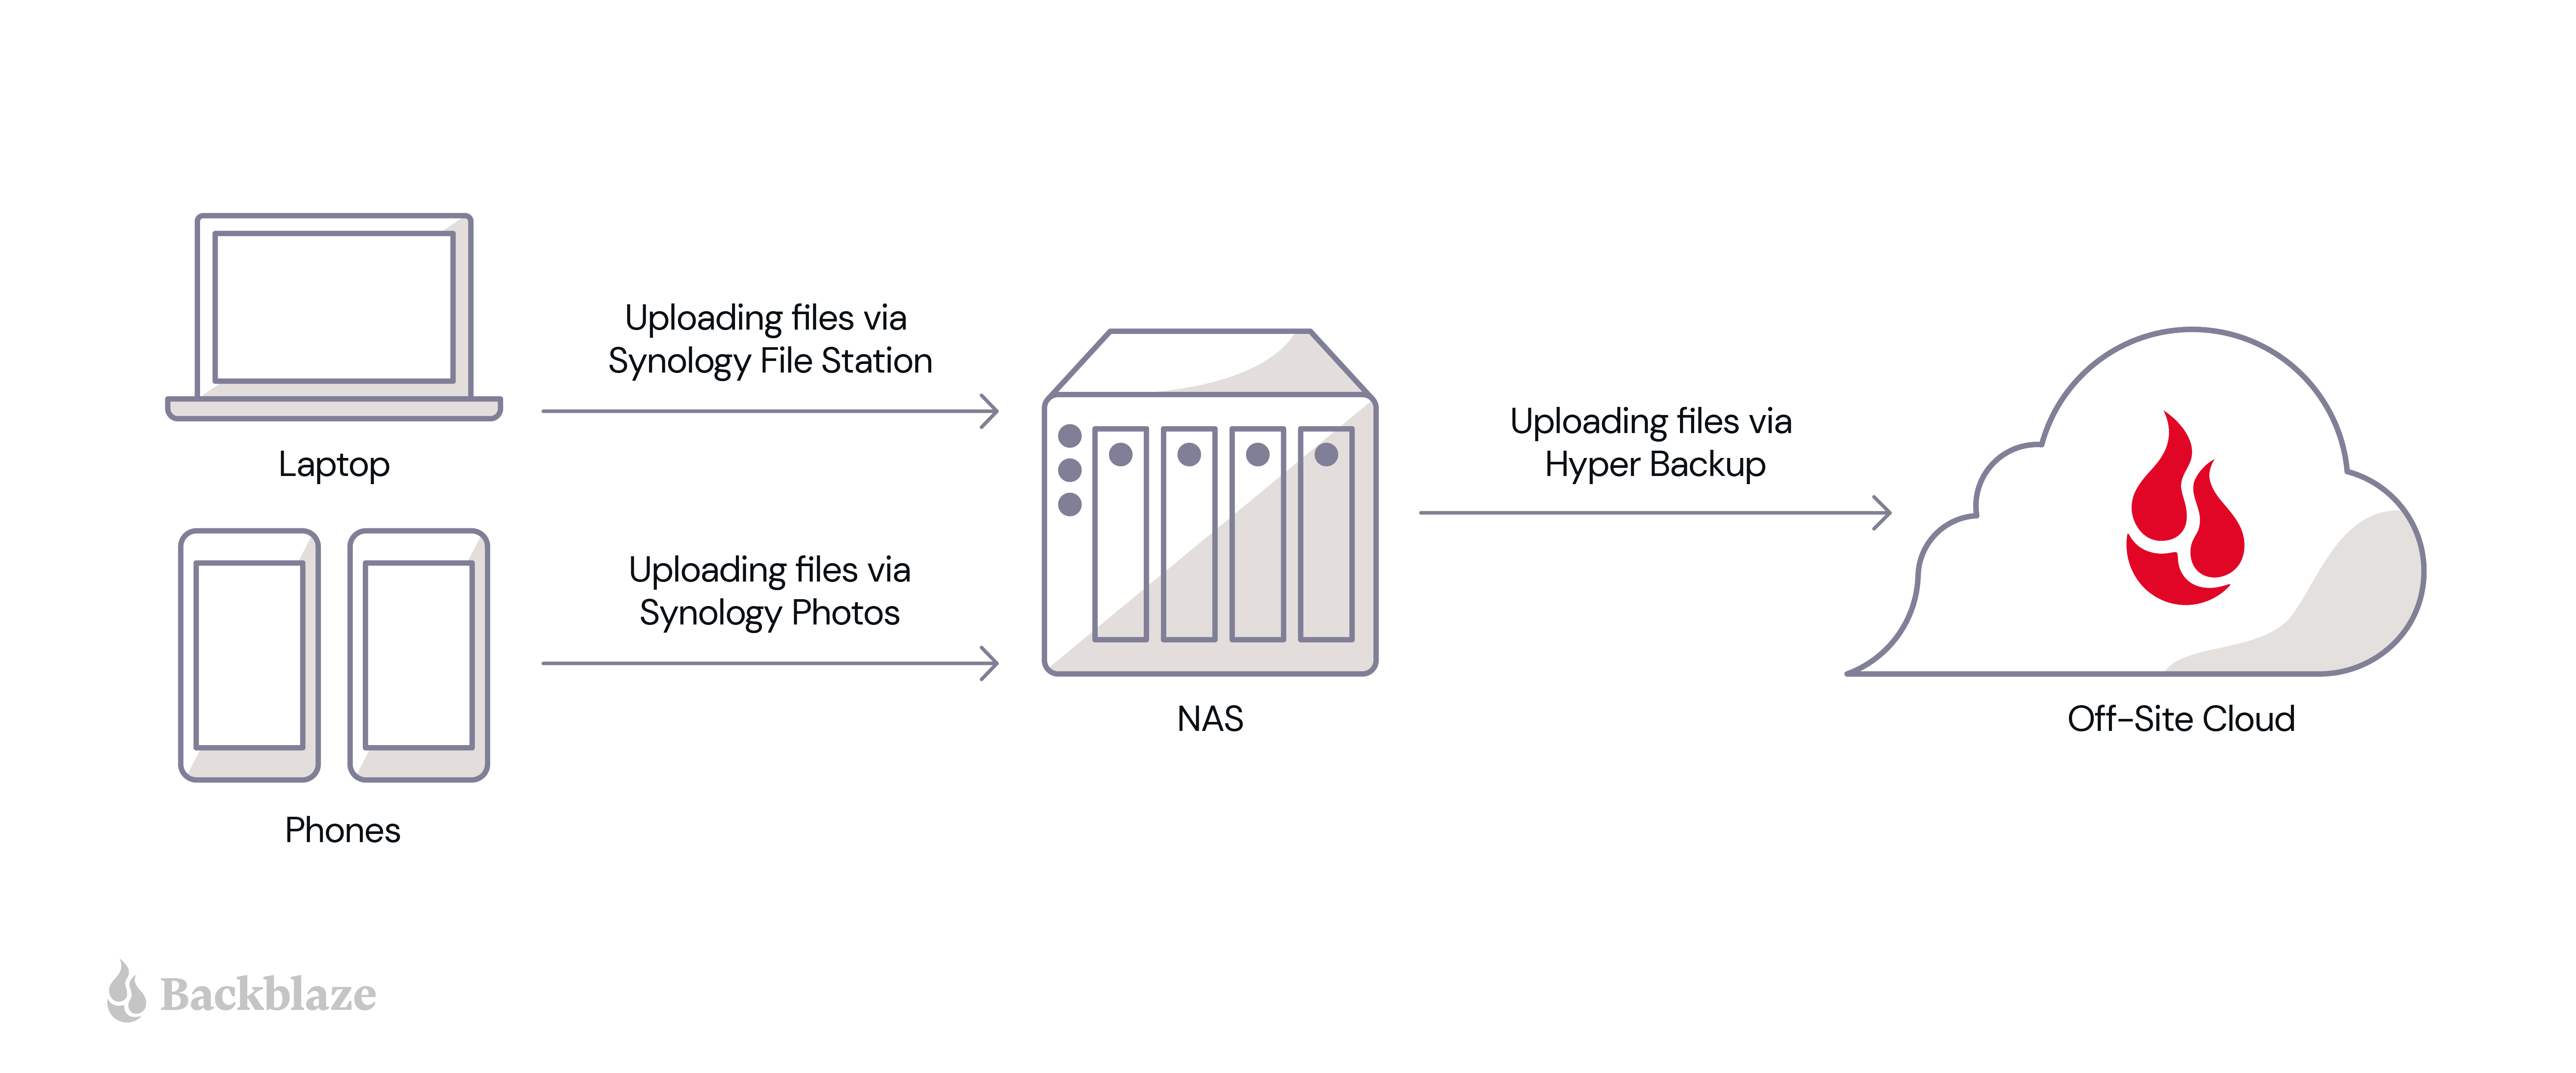
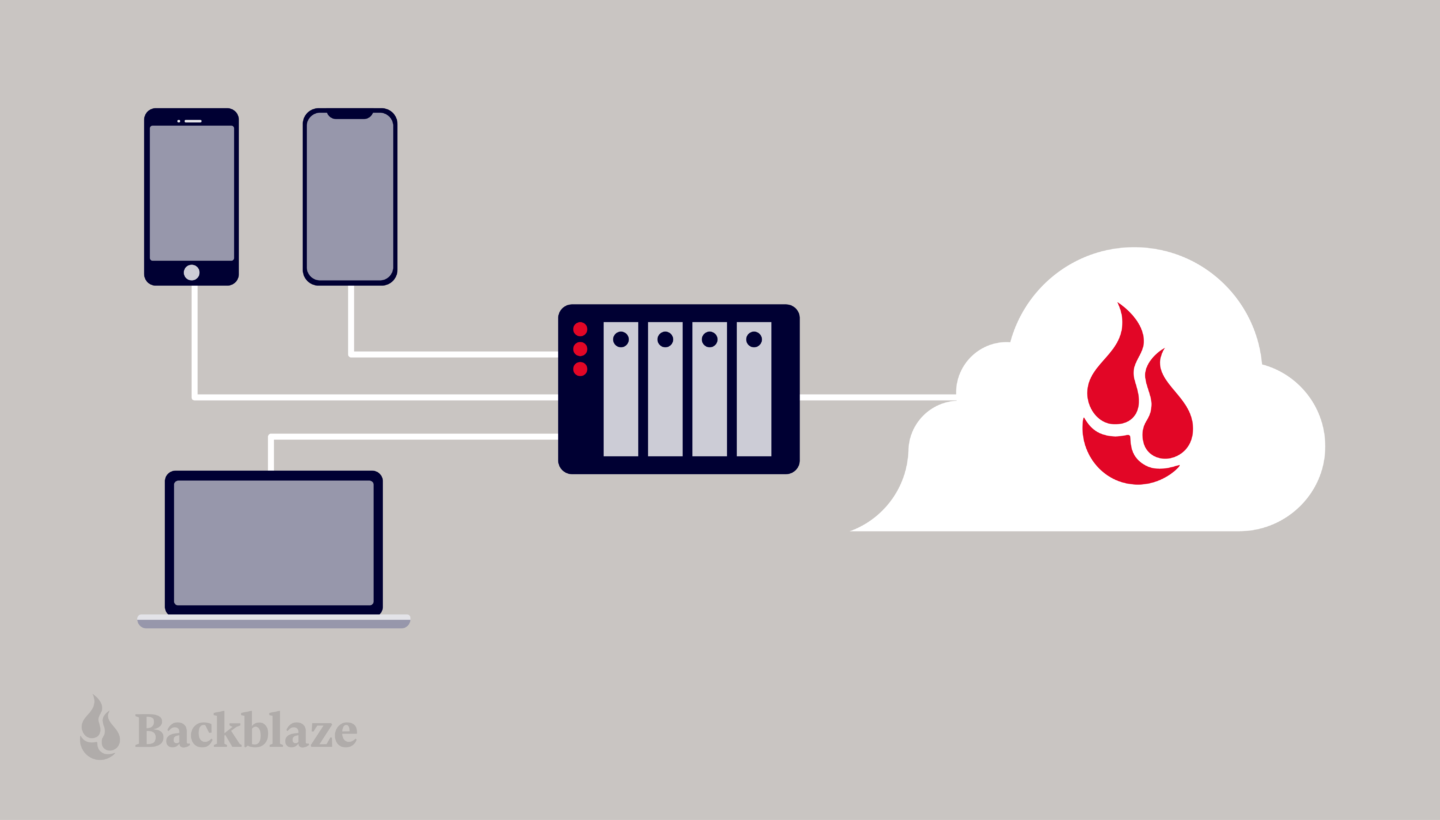
The above diagram shows how I use a hybrid setup using Synology NAS and B2 Cloud Storage to protect data locally and off-site.
First, I use Synology File Station to upload critical business data to the NAS device. After I configure B2 Cloud Storage with Hyper Backup, all files uploaded to the NAS device automatically get uploaded and stored in B2 Cloud Storage.
Getting set up with B2 Cloud Storage is a simple process. Check out this video demonstration that shows how to get your NAS data to B2 Cloud Storage in 10 minutes or less.
How I Back Up iPhone Photos and Videos to My NAS Device
That takes care of our computer backups. Now on to photo storage. To off-load photos and movies and create more storage space on my phone, I installed the application “Synology Photos” on my and my wife’s iPhones. Now, whenever we take a picture or shoot a movie on our phones, the Synology Photos application automatically stores a copy of the files to the NAS device. And, the Hyper Backup application then copies those photos and movies to B2 Cloud Storage automatically.
This setup has enabled us to not worry about storage space on our phones. Even if we delete those pictures and movies, we can still access them quickly via the NAS device over our local area network (LAN). But most importantly, a copy of those memories is protected off-site in the cloud, and I can access that cloud storage copy easily from anywhere in the world.
Lessons Learned: What I’d Do Differently The Next Time
So, what can you take from my experience setting up a NAS device at home? I learned a few things along the way that you might find useful. Here is my advice if I were to do things differently the second time around:
- Number of bays: I opted for a single bay NAS device for my home setup. After using the device for about three months now, I realize how much space it saved on my MacBook and iPhones. If I were to do it again, I’d choose a NAS device with four or more bays for increased storage options.
- Check for Ethernet connectivity: Not all rooms in my house were wired for Ethernet connectivity, and I did not realize that until I started setting up the NAS device. I needed to get in touch with my internet service provider to provide Ethernet connectivity in all rooms—which delayed the setup by two weeks. If you’re looking to set up a NAS device at home, ensure the desired location in your home has an Ethernet connection.
- Location: I initially wanted to set up my NAS device in the laundry room. However, I realized NAS devices require a space that is well ventilated with minimum exposure to heat, dust, or moisture. Therefore, I’d chosen to set up the NAS device at my office room instead. Consider factors like ventilation, accessibility, and dust exposure of the location for the longevity and performance of your NAS device.
So, whether you are a home user who wants additional storage, a small business owner who wants to create a centralized file storage system, or an IT admin for a mid-size or enterprise organization who wants to securely protect your critical business data both on-premises and off-site storage, the use of a NAS device along with cloud storage provides the protection you need to secure your data.
What’s Next: Looking Forward to Part Two
In part one of this series, we’ve learned how setting up a NAS device at home and connecting it to the cloud can effectively back up and protect critical business data and personal files while accomplishing a 3-2-1 backup strategy. Stay tuned for part two, where James Flores will share with us how he utilizes a hybrid NAS and cloud storage solution to back up, work on, and share media files with users from different locations. In the meantime, we’d love to hear about your experience setting up and using NAS devices with cloud storage. Please share your comments and thoughts below.