You’ve added a Synology Network Attached Storage (NAS) Device to your tech stack, but you may be wondering how to protect your files from ransomware, natural disasters, or accidental deletion. Saving your data to cloud storage can help protect you from the painful consequences of data loss. But now you may be wondering whether to backup or sync your data to the cloud. The answer to that question will largely depend on your own individual needs. If you are looking to keep an additional copy of your regularly changing data at an off-premise location to maintain the 3-2-1 backup strategy, then backing up your data to the cloud is the way to go.
If, however, you need your files in a place where everyone in the organization can access them at any moment, where edits to any files can be shown across all devices in real time or you need up-to-the-minute versions of your files off-site, then syncing your files to the cloud will be sufficient.
Your Synology NAS has applications for either backup—Hyper Backup—or sync—Cloud Sync—which we will explain in greater detail below. Understanding the distinction between the two functions is an important part of setting your tech stack up for success. And setting your tech stack up to connect to Backblaze B2 Cloud Storage, gives you greater security, accessibility and off-site peace of mind at a fifth of the cost of other cloud providers.
Read on to learn the differences between backup and sync, how they work with your Synology NAS, and how to connect your NAS to Backblaze B2.
Backup vs. Sync
As mentioned before, understanding the difference between backup and sync is a crucial step in determining how you will pair your NAS with an offsite cloud storage solution like Backblaze B2. As such, it may help you to have a full understanding of the difference between the two.
A backup lets you create copies of files and other digital assets, which are then sent from a NAS to another device or an off-site storage location such as a public cloud. Allowing for either incremental or full backups of the contents of your NAS on a customized schedule, this method allows you to retain a copy of the most recent version of a file, while also being able to retain previous versions. This can also be an effective strategy to combat malware or ransomware, as you can simply delete infected files and restore from a clean backup. In addition, maintaining storage off-site protects your data from any natural disasters that might befall your immediate vicinity.
By contrast, a sync strategy consists of one or more devices working in unison, updating files in the same way across each device and/or a cloud storage location. The benefits of syncing files come from the ability to instantly see updates on files and provide easy access to changes in files to people across your organization. If you connect your NAS to Backblaze B2, you can easily access and download files anywhere you are through native applications or another Backblaze partner integration like Veeam, Iconik, and Cyberduck. The drawback of syncing is that it does not offer effective protections against accidental deletions, unauthorized access or malware.
There are essentially two different ways to sync your files: one-way or two-way. In a one-way sync, when a file from Location A changes, the same file at Location B is updated; however, if something on the file changes in Location B, the file in Location A will not be updated. On the other hand, in a two-way sync, regardless of where the file changes, the other location will automatically update to mirror the other. And in most cases, this means the entire file will be re-uploaded.
It is not uncommon for an organization to use both backup and sync strategies simultaneously, relying on one over the other as needs change. Thankfully, Synology has two relevant proprietary applications that serve the various needs of backing up and syncing data which can be seen in the table below. 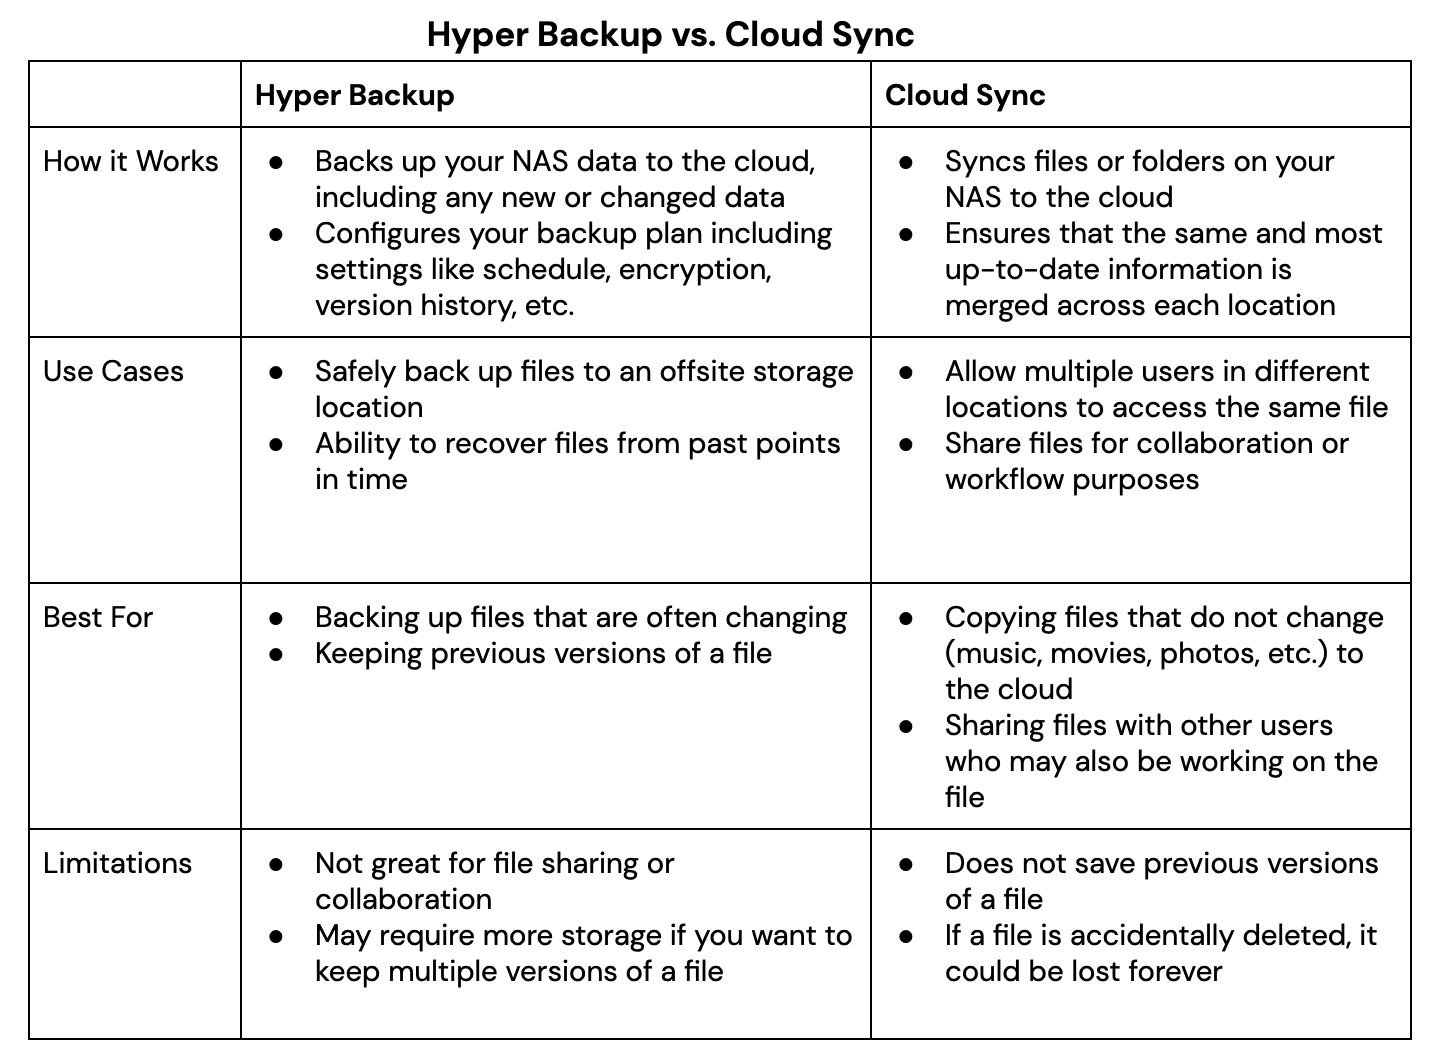 Whether you plan to utilize the backup and sync features Synology offers via Hyper Backup and Cloud Sync, securing your files to the cloud will help you create an effective 3-2-1 Backup Strategy, protecting your digital assets. Now we’ll take a closer look at how you can connect your Synology NAS to Backblaze B2 Cloud Storage.
Setting Up Your B2 Cloud Storage Account
Regardless of whether you use Hyper Backup or Cloud Sync, you can get set up in minutes with B2 Cloud Storage. You can follow along with the directions in this blog or take a look at our video guides. Pat Patterson, Chief Technical Evangelist, demonstrates how to get your data into B2 Cloud Storage in under 10 minutes using either Hyper Backup or Cloud Sync.
Here’s a video tutorial for Hyper Backup:
And here’s one for Cloud Sync:
The first step is to create a Backblaze B2 Cloud Storage account so your data has a location to be securely stored. You can sign up for an account and get started with 10GB of storage for free.
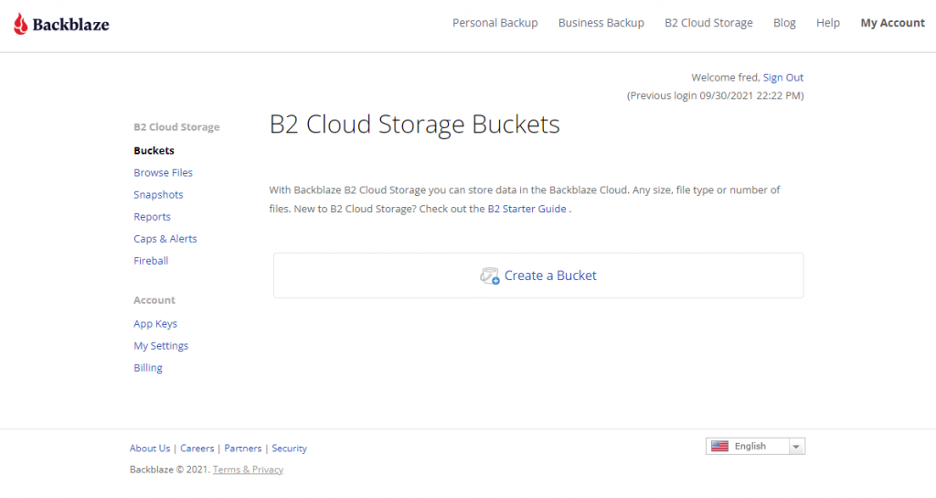
We’ll continue to show the steps after you’ve signed up for a Backblaze B2 Account in order to access your new bucket, Application Key ID, and Application Key. This will only take a few clicks, a couple names, and less than a minute.
- On the Buckets page of your account, click the Create a Bucket button.
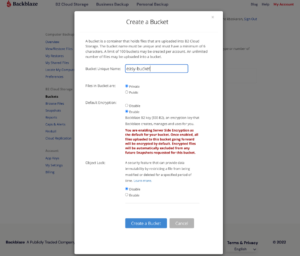
- Give your bucket a name and enable encryption for added security.
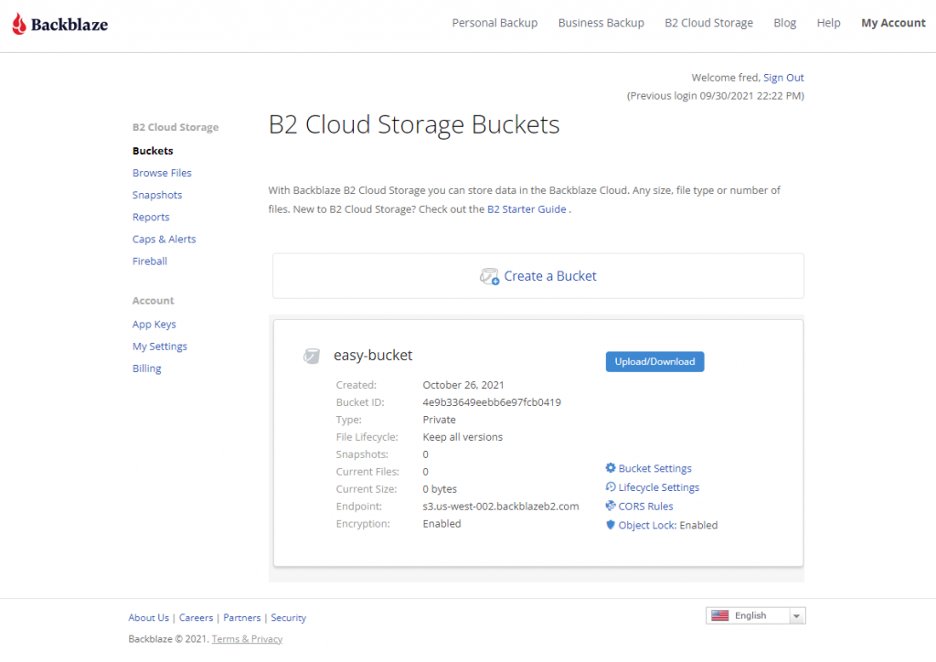
- Click the Create a Bucket button and you should see your new Bucket on the Buckets page.
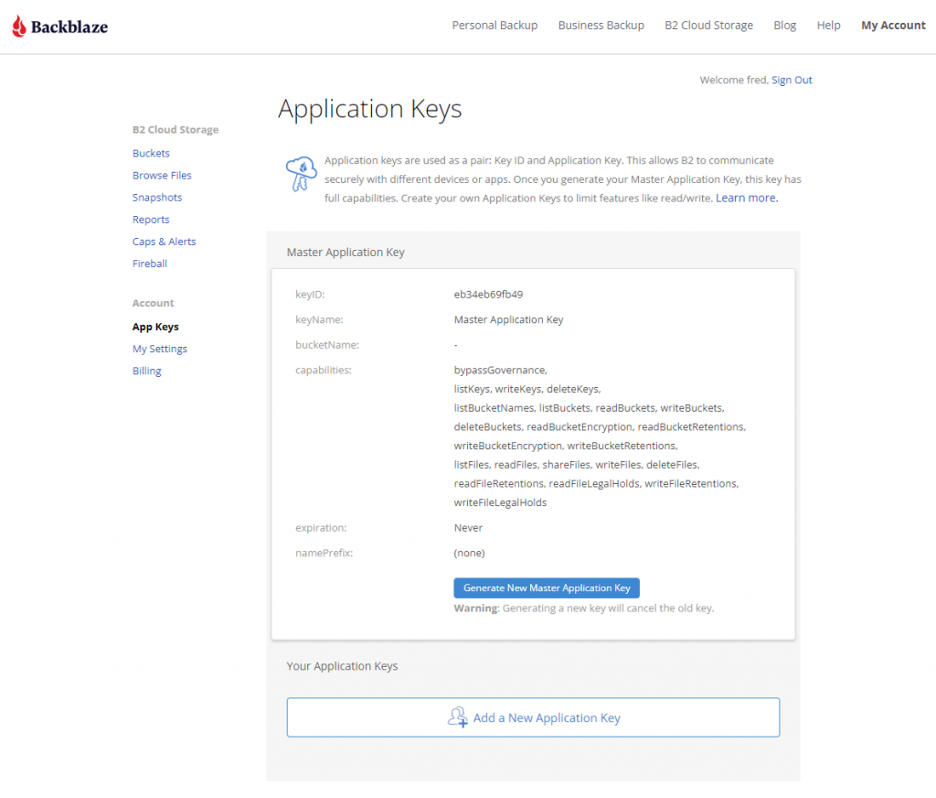
- Navigate to the App Keys page of your account and click the Add a New Application Key button.
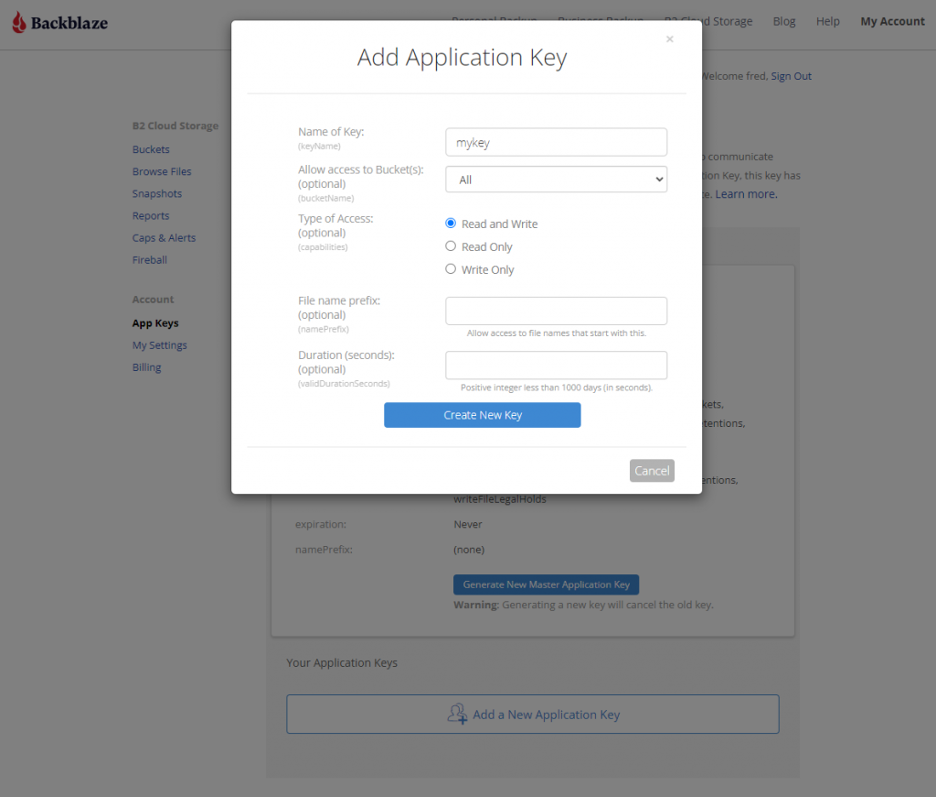
- Name your Application Key and click the Create New Key button—make sure that your key has both Read and Write permissions (the default option).
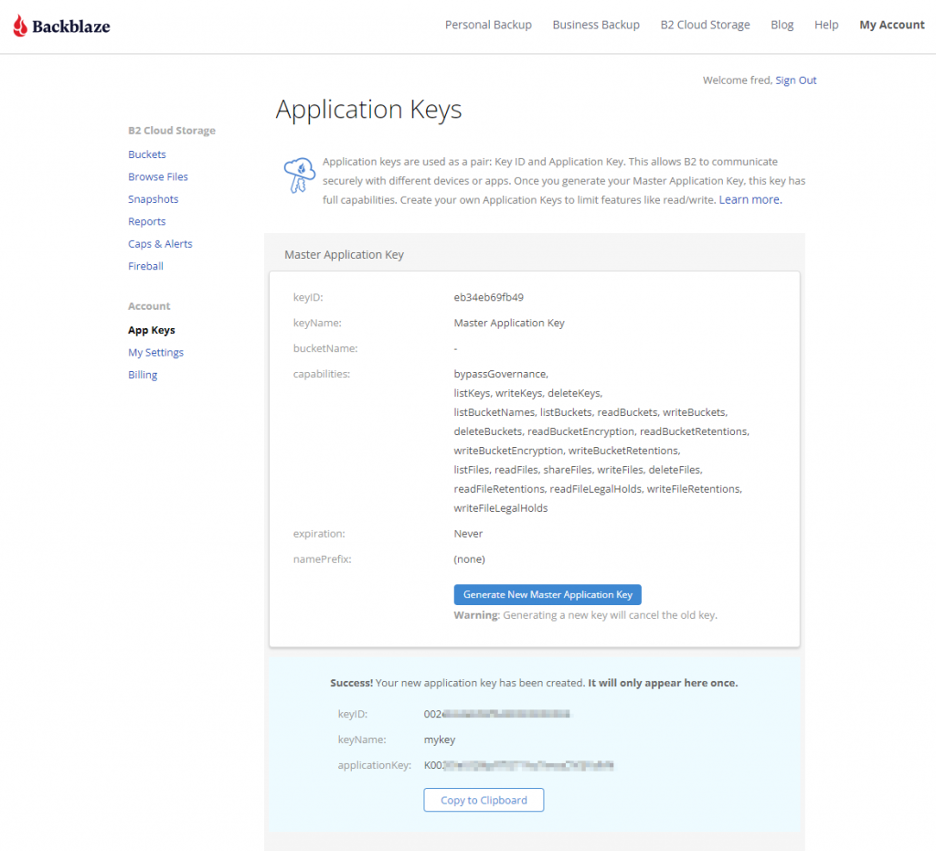
- Your Application Key ID and Application Key will appear on your App Keys page. Make sure to copy these somewhere secure as the Application Key will not appear again!
Backing Up or Syncing Your Synology to Backblaze B2
By now you have created the location for your data to be either backed up or synced to and obtained your Application Key.
If you want to backup your data, then follow this integration guide or the video mentioned above that takes you step-by-step on how you can use Hyper Backup to backup your data from your Synology to B2 Cloud Storage.
If syncing your data is what you need, then follow this integration guide or the video mentioned above that takes you through how you can use Cloud Sync to sync your data from your Synology to B2 Cloud Storage.
Once you have built the connection between your Synology to B2 Cloud Storage either through Hyper Backup or Cloud Sync (or both!), you can begin backing up or syncing your data for greater protection and accessibility no matter the location.
Summary
Creating and implementing an effective backup strategy, sync strategy or hybrid of the two can be an effective way to protect your data. A thorough understanding of the benefits, drawbacks and strategies involved, and the ways your Synology NAS can utilize both Hyper Backup and Cloud Sync, will hopefully get you on your way to securing your data.
At a fifth of the price of competitors, with setup that takes less than 10 minutes, Backblaze B2 Cloud Storage is a great complement to your Synology NAS.