A while back, I received a frantic phone call from a long time friend who teaches ninth grade English. Now, don’t get me wrong, this friend, let’s call her Alex, is a tech-savvy person. She has more apps on her smartphone than I knew existed, but she had never used an external hard drive before.
Her school district had given them out to help make remote learning easier on teachers, but she was nervous about using it incorrectly, breaking it, or even just being able to find it on her computer. And she was a little embarrassed because it seemed like something everyone else already knew how to use.
If you’ve ever felt a bit lost when it comes to hard drives, don’t worry—you’re not alone. If you’re one of many folks who’ve asked themselves, “What is this thing?” and “How will it be helpful to me?” and “What if I break it?” then I’m here to walk you through everything I walked Alex through. Lots of folks have the same questions, and we’ll answer them in this guide for setting up and protecting your new hard drive.
A Guide to Setting Up Your First External Hard Drive
Getting Started
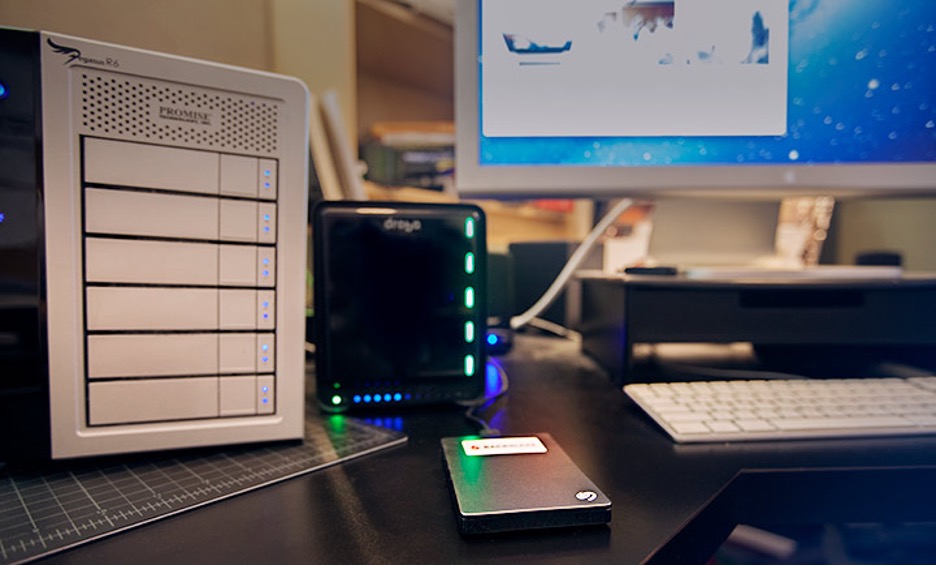
While it might seem like a no-brainer, the first step for setting up your hard drive is to plug it into your computer. Small, external, portable hard drives typically have one cord that plugs into your computer so you can transfer data. It also powers the hard drive. Some models may have another cord for added power—if so, you’ll want to plug in both.
Finding Your Hard Drive on Your Computer
On a Mac, locating your connected external drive is straightforward. Open Finder, which you can access by clicking the default Finder icon in your applications Dock, using Command + Space bar to search for Finder, or pressing Shift + Command + C. Once in Finder, your drives should appear either immediately or in the left-hand navigation column under “Locations.” Click on the specific drive you want to access to view its contents.
For Windows computers, the steps may vary depending on your Windows version. In general, you can find your drives in File Explorer by clicking on Computer or This PC in the left-hand navigation bar of a File Explorer window. If you’re unsure how to open File Explorer, look for it in your Start Menu, or try clicking on your desktop and pressing Windows Key + E together. Once you’ve located your drives, simply click on the one you wish to explore to access its contents.
Saving Files to Your External Hard Drive
External hard drives are a breeze to use. Once you’ve plugged them in and found them on your computer, you can simply copy files onto the hard drive by clicking and dragging them into the Finder or File Explorer window. This creates a copy on your hard drive, while leaving the original on your computer or laptop.
External Hard Drive Best Practices
Once you know how to use your external hard drive, there are a number of things you can do to maintain it and keep it organized. Your hard drive will fail eventually (more on that later), but there are things you can do to keep it working as long as possible. And there are things you can do to make sure you can easily find what you’re looking for.
1. Keep Your Drive Clean
Maintaining the cleanliness of your external hard drive involves two essential steps: caring for the hard drive itself and keeping the surrounding computer area tidy. The biggest priority is to ensure that both your hard drive and its immediate environment remain free from dust. A dust-free environment contributes to unimpeded airflow within your device, reducing the risk of overheating. If your hard drive has already been exposed to a dusty environment, compressed air is the most effective cleaning tool to remove it.
To effectively use compressed air, first identify key areas for cleaning. Look for the fan vent, inspect the USB ports, and examine other spots on the external hard drive that may accumulate dust over time. Then, simply blast those areas with the compressed air to remove some of the built up dust. (Bonus: it’s super fun.)
Lastly, it’s crucial to maintain an uncluttered area around your external hard drive to facilitate optimal airflow. Take the time to relocate any objects that might obstruct the airflow, such as books, papers, and other potential obstructions. This simple step can significantly enhance the longevity and performance of your external hard drive.
2. Keep Your Operating System Up to Date
The second best practice has more to do with your computer or laptop than your hard drive, but that’s what your hard drive connects to—so it’s important to keep it working, too.
We have all hit “remind me later” on an update dialog from our computer at some point in our lives, but updating your operating system (OS) will ensure that your computer is secure, that your system can run better, and that hard drives are able to properly connect to your files. Updating your OS can vary depending on what kind of computer you have. The best place to look for how to update your OS is in your system’s preferences.
Depending on the age of your computer, however, you should reach out to your local IT person before updating. Some older computers are not able to run, or run very poorly, on newer systems.
3. Know What’s On Your External Hard Drive
External hard drives are simple: you plug them in, they appear on your computer, and you can simply click and drag your files onto them to copy the files onto the hard drive. If you’re a more advanced user, you may have set up your external hard drive so that there are files that only exist on that device. Either way, it’s important to monitor what’s on your external hard drive and minimize digital clutter, just like you would with your computer or laptop. You can do this by periodically checking your drive to make sure your files are up to date and still needed.
4. Delete Duplicates
When you’re reviewing the contents of your external hard drive, keep in mind the significance of deleting duplicates. There are times when we unintentionally generate multiple copies of a project or document or save several versions of the same file, especially when finalizing edits. Removing redundant duplicates not only contributes to a speedier hard drive performance but also creates room for additional files. You can either manually inspect your files for duplications or use specialized applications designed to detect and delete duplicate files residing on your drive.
Protecting Your Data on an External Hard Drive
3-2-1 Backup
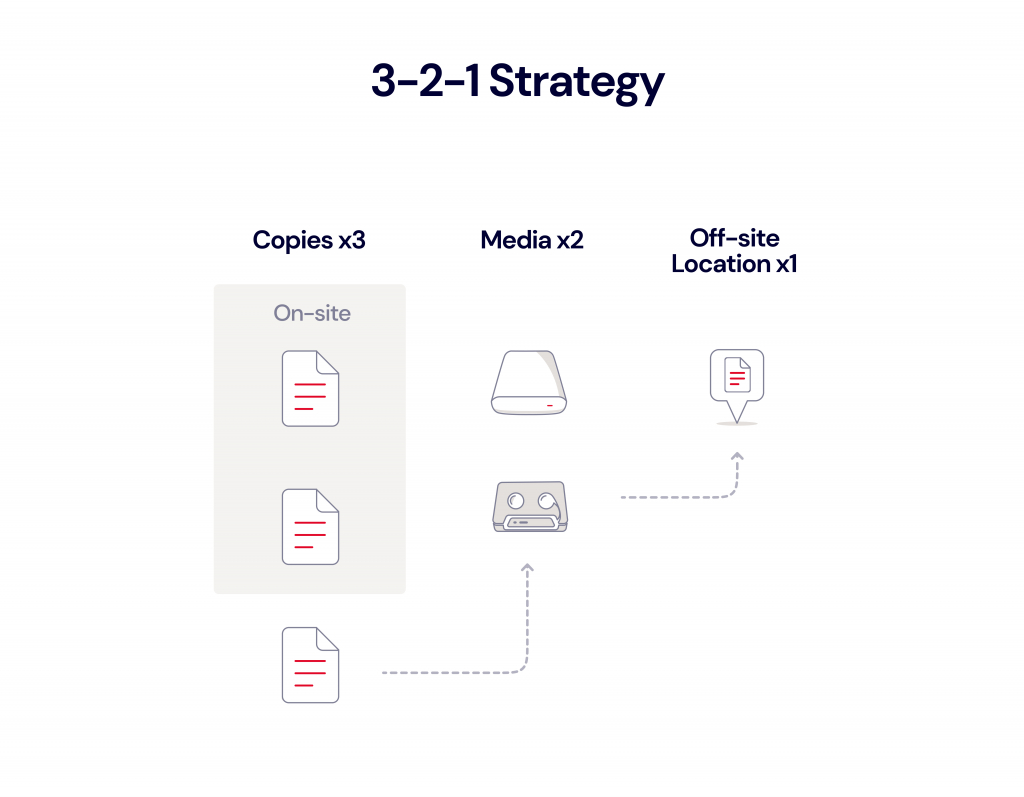
Implementing a 3-2-1 backup strategy means maintaining a minimum of three complete copies of your data. Two of these copies should reside locally but on distinct types of media, such as an external hard drive. The third copy must be stored offsite, away from your primary location. For instance, if you have your files on your computer and an external hard drive (which should be stored separately from your computer when not in use), you should maintain one additional copy stored independently, beyond the confines of your home. This is where the cloud comes in.
There are several cloud-based services that will back up your computer and your attached drives. We’re partial to our own, of course, and, here’s our guide to making sure your external hard drives are backed up. And, with Backblaze’s Forever Version History, you’ll always have a copy of your hard drive data, updated from the most recent time you plugged it in.
Prepare for a Drive Failure
The only truth about computer hardware is that it will fail eventually. We know a little bit about that. Most hard drive manufacturer warranties span only three to five years, and budget-friendly drives often have even shorter lifespans. These time frames don’t factor in variables like physical wear and tear, specific make or model, or storage conditions.
When using an external hard drive, you have to prepare for the day that it fails. Fortunately, there are several methods to monitor your external hard drive’s health, with telltale signs that it’s approaching the end of its service life. These signs may include unusual clicking or screeching sounds, sluggish performance, and frequent errors when attempting to access folders on the drive. You can also manually assess your drives’ status directly from your computer.
How to Find Out if Your Drive Is Failing
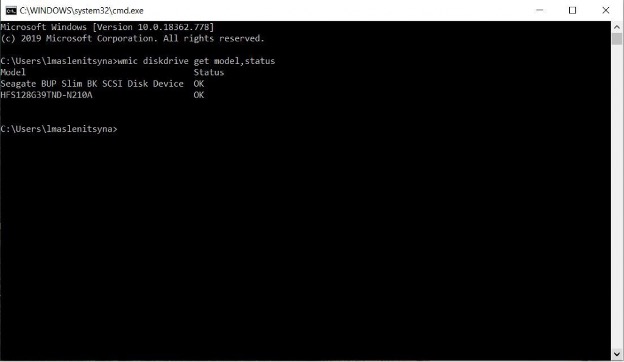
For a Windows computer, you’ll use a simple command prompt that will tell your computer where to look and what to check. Just right-click the Start menu on your computer, select Run, and type “cmd” or type “cmd” into the search bar. In the Command Line window that opens, copy and paste wmic diskdrive get status and hit enter. This command will run and it will return “Pred Fail” if your drive is not performing, or “OK” if the drive is performing well.
For a Mac computer, you can monitor the status of your external hard drive by opening Disk Utility. You can find it by going to Applications and then Utilities. Next, you will click on the drive you would like to test to see how it’s performing. Click the View button in the toolbar, then select Show SMART Status. This will display the SMART status of your hard drive as either “Verified” (healthy) or “Failing” (indicating a potential problem). Disk Utility will not detect or repair all problems that a disk may have, but it can give you a general picture.
Note: The process for running these diagnostics may vary slightly depending on your OS and the specific utility you use.
How to Run SMART Diagnostics on Your Hard Drive
Running SMART (Self-Monitoring, Analysis, and Reporting Technology) diagnostics on your hard drive is a smart (see what we did there?) way to assess its health and predict potential issues. SMART diagnostics provide valuable insights into your drive’s performance and can help you detect problems before they lead to data loss.
You can use third-party software utilities like CrystalDiskInfo or HDDScan to access more detailed SMART data and view drive health in a user-friendly interface. Download and install one of these tools, then launch it and select your hard drive to view its SMART attributes and health status.
In Conclusion
Starting out with an external hard drive is exactly like starting out with any piece of technology you might own. The more you educate yourself on the ins and outs of taking care of it, the better it will run for you. But if something bad were to happen, you should always have a backup plan (we suggest Backblaze, but you probably already know that) to protect your new piece of equipment.
External Hard Drive FAQs
On a Mac, open Finder. Once in Finder, your drives should appear either immediately or in the left-hand navigation column under “Locations.” For Windows computers, the steps may vary depending on your Windows version. In general, you can find your drives in File Explorer by clicking on Computer or This PC in the left-hand navigation bar of a File Explorer window.
Once you’ve plugged in your hard drive and found it on your computer, you can simply copy files onto the hard drive by clicking and dragging them into the Finder or File Explorer window. This creates a copy on your hard drive, while leaving the original on your computer or laptop.
Keeping your drive clean and dust-free is the best way to maintain it. This involves two essential steps: caring for the hard drive itself and keeping the surrounding computer area tidy. The biggest priority is to ensure that both your hard drive and its immediate environment remain free from dust. A dust-free environment contributes to unimpeded airflow within your device, reducing the risk of overheating. If your hard drive has already been exposed to a dusty environment, compressed air is the most effective cleaning tool to remove it.
There are several telltale signs that your hard drive is approaching the end of its service life. These signs may include unusual clicking or screeching sounds, sluggish performance, and frequent errors when attempting to access folders on the drive. You can also manually assess your drives’ status directly from your computer.