How to Use Quest QoreStor with Backblaze B2
- Print
- DarkLight
How to Use Quest QoreStor with Backblaze B2
- Print
- DarkLight
Article summary
Did you find this summary helpful?
Thank you for your feedback
Quest QoreStor is a storage product that allows global dedupe and compression across all media it stores. You can use QoreStor as a backup repository destination to dedupe all of your backups, saving network bandwidth and cloud storage costs. It works directly with many backup vendors and also emulates a network-attached storage (NAS) with common internet file system (CIFS) and network file system (NFS) support, which is how it works with Veeam.
You can configure QoreStor with Backblaze B2 Cloud Storage and Veeam Backup and Recovery.
These instructions are for Veeam 11 and above. For more detailed information about connecting QoreStor to Veeam, see the QoreStor integration guide for Veeam.
Note
To get the full benefits of the deduplication that is offered by QoreStor, you must install QoreStor Rapid CIFS plug on your Veeam Proxy server. You can download the Windows Rapid CIFS plug for your version of QoreStore here.
Enable Backblaze B2
Before you begin: You must have a Backblaze B2 Cloud Storage account. If you already have a Backblaze account and the left navigation menu contains a B2 Cloud Storage section, your account is already enabled for Backblaze B2.
- Sign in to the Backblaze web console.
- In the user menu in the upper-right corner of the page, select My Settings.
- Under Enabled Products, select the checkbox to enable B2 Cloud Storage.
- Review the Terms and Conditions, and click OK to accept them.
Create an Application Key
Sign in to the Backblaze web console.
In the left navigation menu under B2 Cloud Storage, click Application Keys.
Click Add a New Application Key, and enter an app key name.
You cannot search an app key by this name; therefore, app key names are not required to be globally unique. Key names are limited to 100 characters and can contain letters, numbers, and "-", but not I18N characters, such as é, à, and ü.Select All or select a specific bucket in the Allow Access to Bucket(s) menu.
If you select a specific bucket, you can also select Allow List All Bucket Names.
This option is required for the B2 Native API b2_list_buckets and the S3-Compatible API S3 List Buckets operations.
(Optional) Select your access type (Read and Write, Read Only, or Write Only).
(Optional) Enter a file name prefix to restrict application key access only to files with that prefix.
Depending on what you selected in step #4, this limits application key access to files with the specified prefix for all buckets or just the selected bucket.(Optional) Enter a positive integer to limit the time, in seconds, before the application key expires.
The value must be less than 1000 days (in seconds).Click Create New Key, and note the resulting keyID and applicationKey values.
Note
When you create a new app key, the response contains the actual key string, for example N2Zug0evLcHDlh_L0Z0AJhiGGdY. You can always find the keyID on this page, but for security, the applicationKey appears only once. Make sure you copy and securely save this value elsewhere.
Configure Cloud Tier Settings
- Sign in to the QoreStor admin console.
- In the left menu, select Cloud Storage and click Cloud Tiers.
- Click Configure.
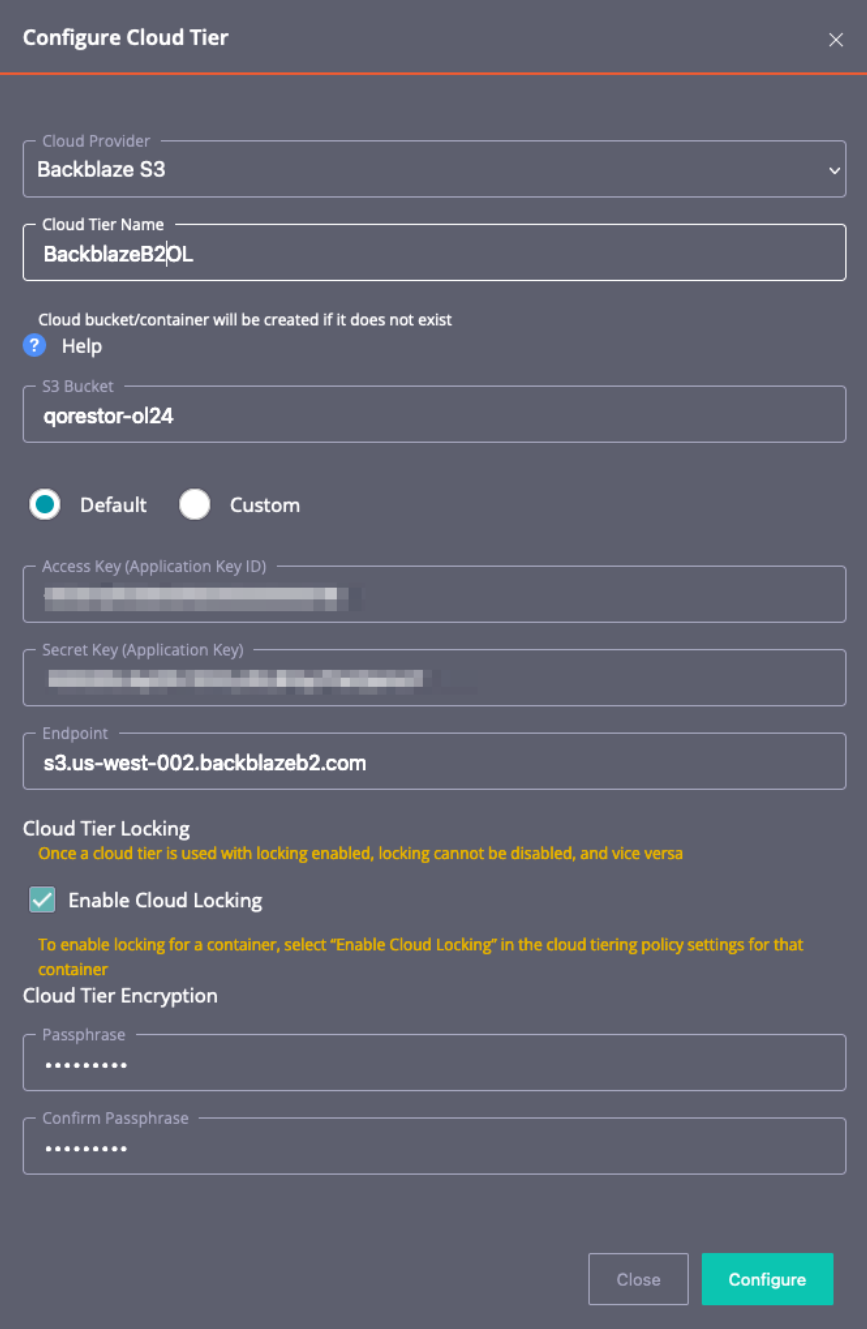
- Enter and select cloud tier options.
- Select Backblaze S3 as the cloud provider.
- Enter the name of the S3 bucket that should be created.
- Enter your keyID in the Access Key field, and enter your applicationKey in the Secret Key field.
- Enter a region and an endpoint.
- Enter and confirm your encryption key.
- Click Enable Cloud Locking to enable Object Lock.
- Click Configure.
Create a Container
You must add a shared folder, called a container, that Veeam can mount to use as a repository.
- In the left menu of the QoreStor admin console, select Containers and click Add Container.
- Select NAS (NFS, CIFS) as the protocol.
- Enter a name for the container.
- Ensure that Storage Group is set to DefaultGroup, and click Next.
- Select Auto as the marker.
- Click Access Protocols, and select CIFS only.
- Select Open (allow all clients) for the CIFS Client Access, or select Create client access list (recommended) to allow only your Veeam or backup servers to access the container.
- Click Next.
- Optionally, enable the Recycle Bin, and click Next.
- Review the container summary, and click Finish.
Add the Container as a Veeam Repository
- Sign in to the Veeam console.
- Under Backup Infrastructure, select Backup Repositories, and click Add Repository.
- Select Network attached storage as your backup repository type, and select SMB share as your NAS type.
- On the Name page, enter a backup repository name and an optional description.
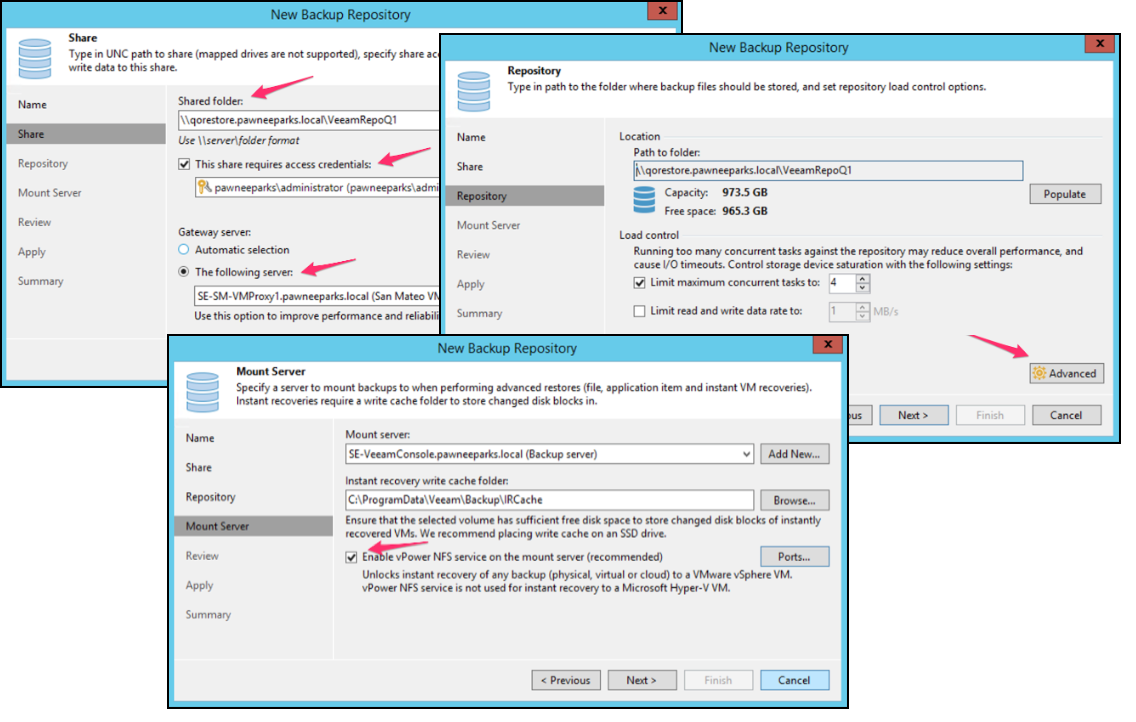
- On the Share page, enter the path to the container on the QoreStor server using UNC naming conventions.
- Add your Windows Admin credentials (not the QoreStor admin credentials).
- Select the proxy server you will use.
This step is important because a QoreStor agent must be installed on this same server. - Customize the repository settings.
- On the Repository page, click Advanced.
- Select Align backup file data blocks (recommended).
- Select Decompress backup file data blocks before storing.
- Ensure that This repository is backed by rotated drives is not selected.
- Select Use per-machine backup files.
- Click OK.
- On the Mount Server page, ensure that vPower NFS is enabled and click Next.
- Review the summary page, and click Apply.
- When the settings are applied, click Next and click Finish.
Create a Backup Job
You must create a backup job that uses the QoreStor repository that you created in the last step.
- In the Veeam console, select the Home menu and click Backup Job.
- Enter a name and a description for the backup job, and click Next.
- On the Virtual Machines page, add the virtual machines that should be part of this backup job and click Next.
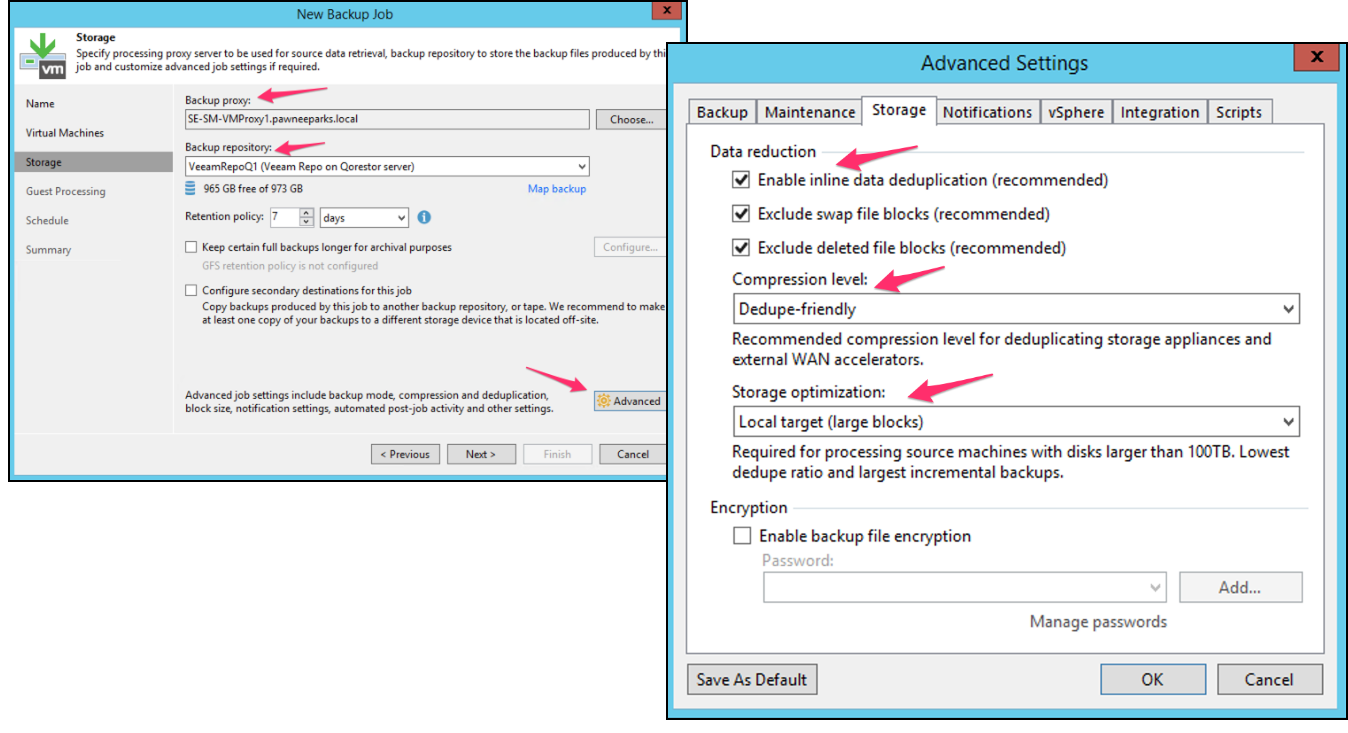
- On the Storage page, select the backup proxy where the Quest Rapid CIFS plug-in was installed, select the QoreStor backup repository, and set your preferred retention period.
- Configure the advanced settings.
- Click Advanced.
- On the Backup tab, select Incremental (recommended) as your backup mode and select Create active full backups periodically.
- On the Storage tab, select the following data reduction options:
- Enable inline data deduplications (recommended)
- Exclude swap file blocks (recommended)
- Exclude deleted file blocks (recommended)
- Select Dedup-friendly as the compression level, and select Local target (large blocks) for storage optimization.
- Click OK.
- On the Guest Processing page, leave all options as their default values and click Next.
- On the Schedule page, select your preferred job schedule options and click Apply.
- Review the job summary, and optionally select Run the job when I click Finish.
- Click Finish.
Configure the Cloud Tiering Policy
- Sign in to the QoreStor admin console.
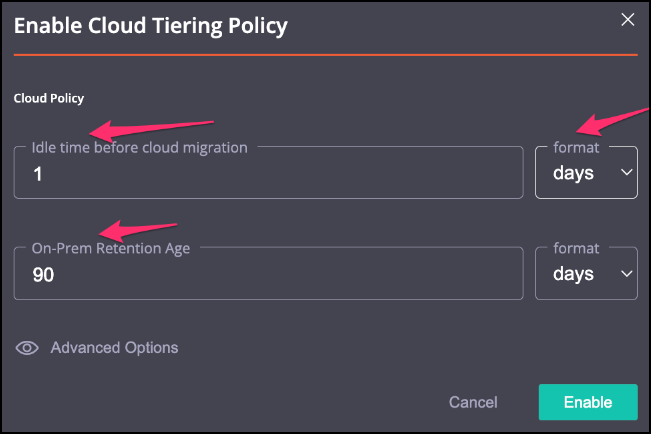
- In the left menu, select Containers, click the three-dot menu, and select Enable Cloud Tiering Policy.
- Define how long the files should be on the local disk before they are copied to your Backblaze B2 bucket.
- Select how long the files should be on the local disk before they are deleted.
- Click Enable.
Was this article helpful?