How to Download and Install the Backblaze Client on your Mac
- Print
- DarkLight
How to Download and Install the Backblaze Client on your Mac
- Print
- DarkLight
Article summary
Did you find this summary helpful?
Thank you for your feedback
You can install the Backblaze Computer Backup client on your MacOS.
When you install Backblaze Computer Backup on a Mac computer, your computer may ask for permission to install the software. In the dialog box, enter the password for your computer and not your Backblaze account.
Install the Backup Client for High Sierra 10.13 and Older
- Download the Backblaze client for macOS.
- Open Finder, navigate to your Downloads folder, and double-click the Backblaze installer .dmg file.
- Click Backblaze Installer.
- If a verification dialog box is displayed, click Open.
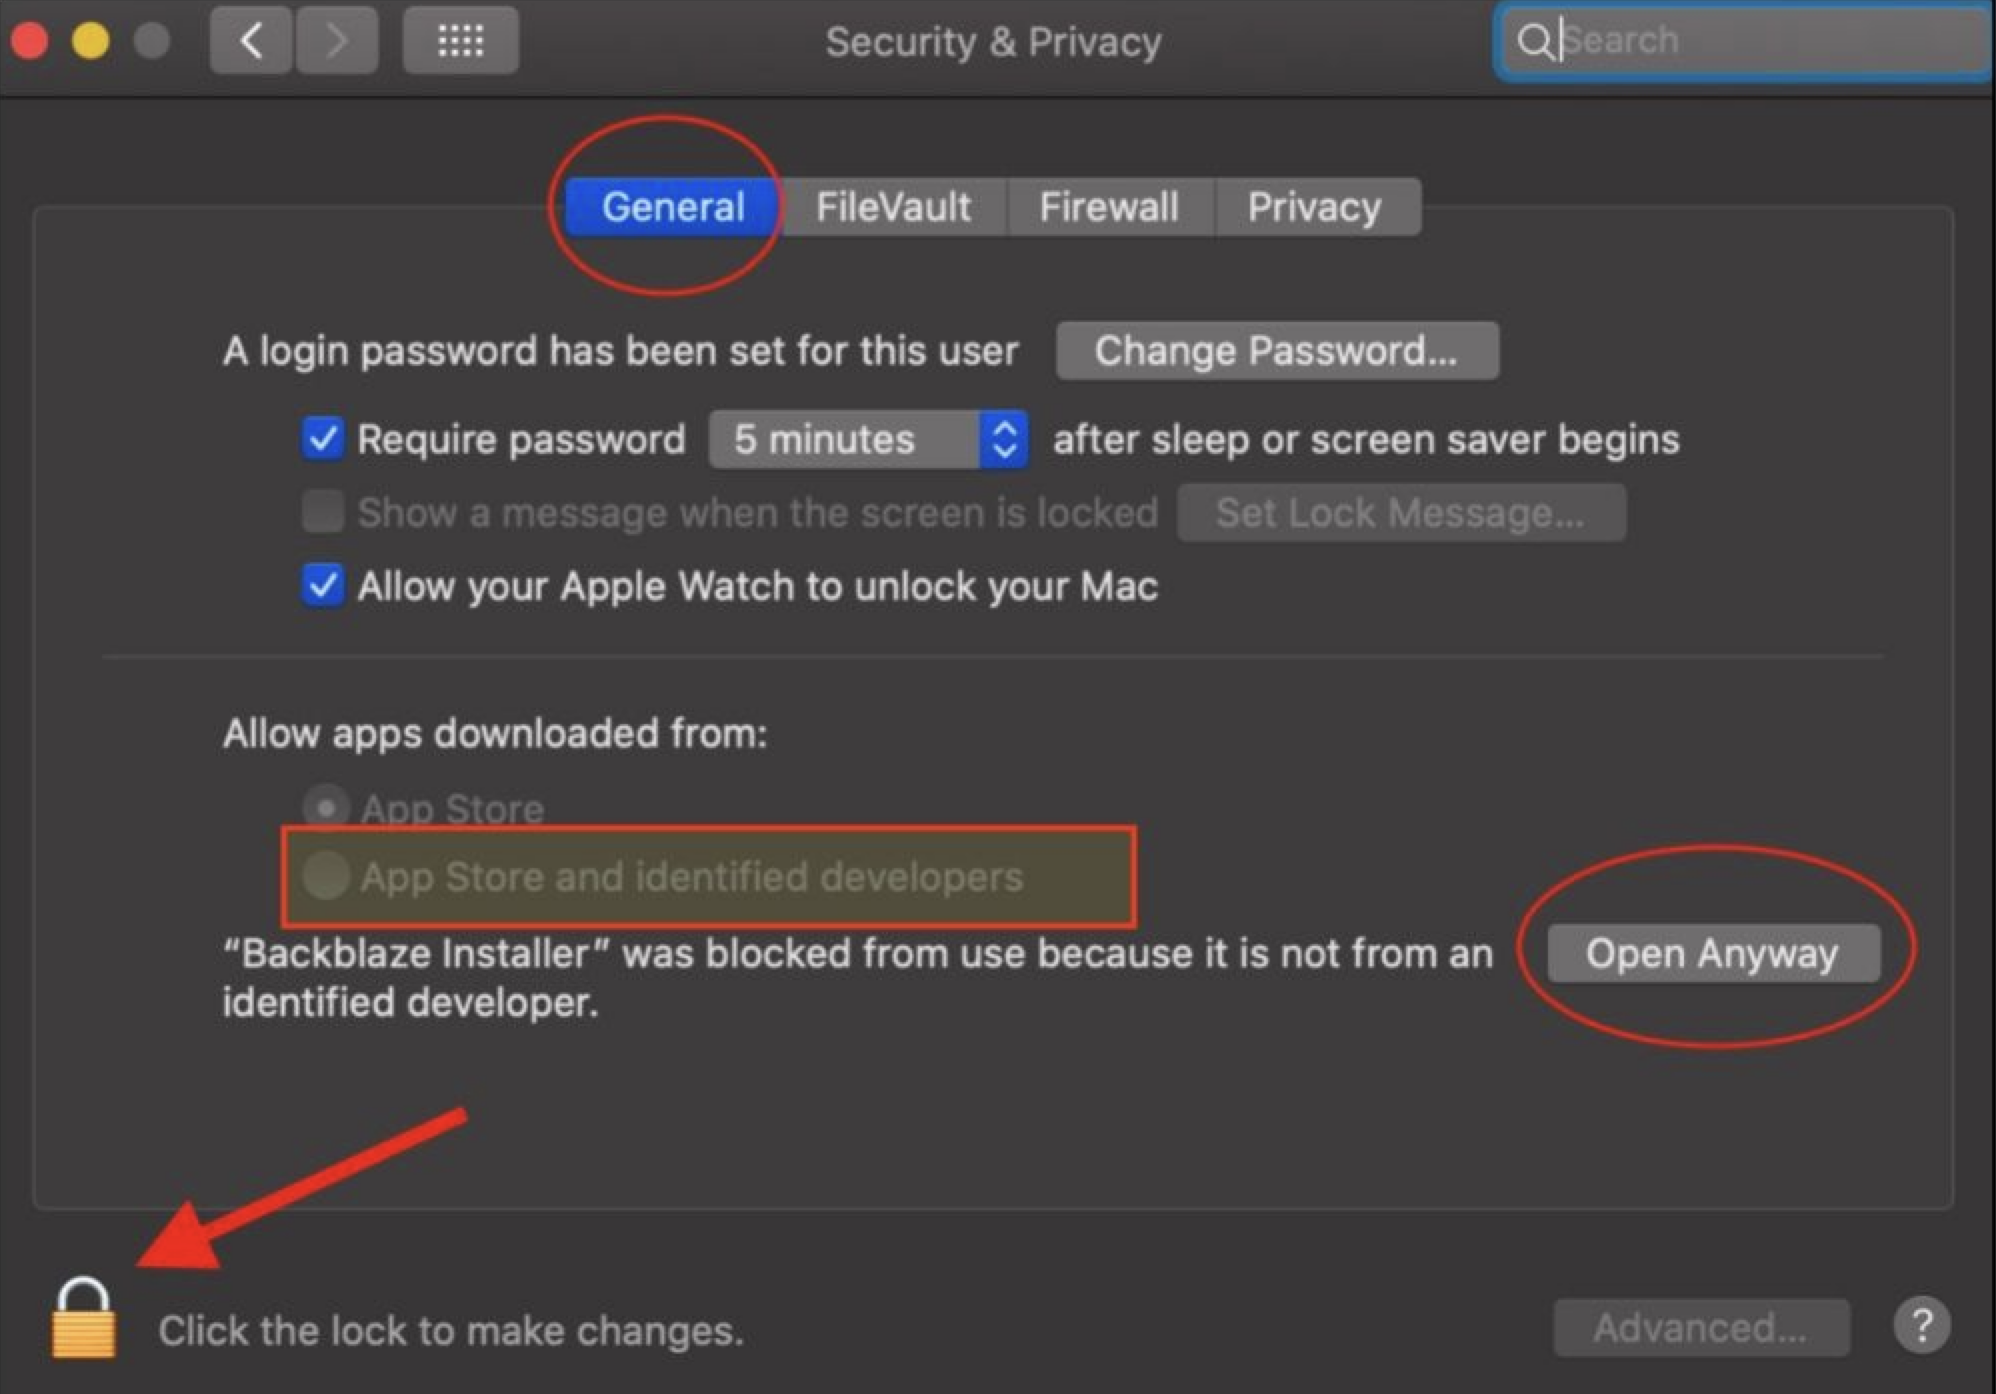
- Navigate to System Preferences on your Mac, and click Security & Privacy.
- Select the General tab.
- Select App Store and identified developers.
- Click the padlock, enter the password for your Mac, and click OK.
- Click Open Anyway, and click Install Now.
Backblaze analyzes your drives and a success message is displayed. Backblaze begins backing up your data.
Install the Backup Client for Mojave 10.14 and Newer
In macOS 10.14 and newer, Apple made significant changes to their Security and Privacy which can prevent the Backblaze client from performing successfully. There are a couple of workarounds for this, starting with the most current operating systems.
Configure Full Disk Access to Install the Backup Client for Ventura 13 or Newer
If your computer is on macOS Ventura or later, ensure that you use the latest version of the client. The initial installation process shows you how to correctly set Full Disk Access.
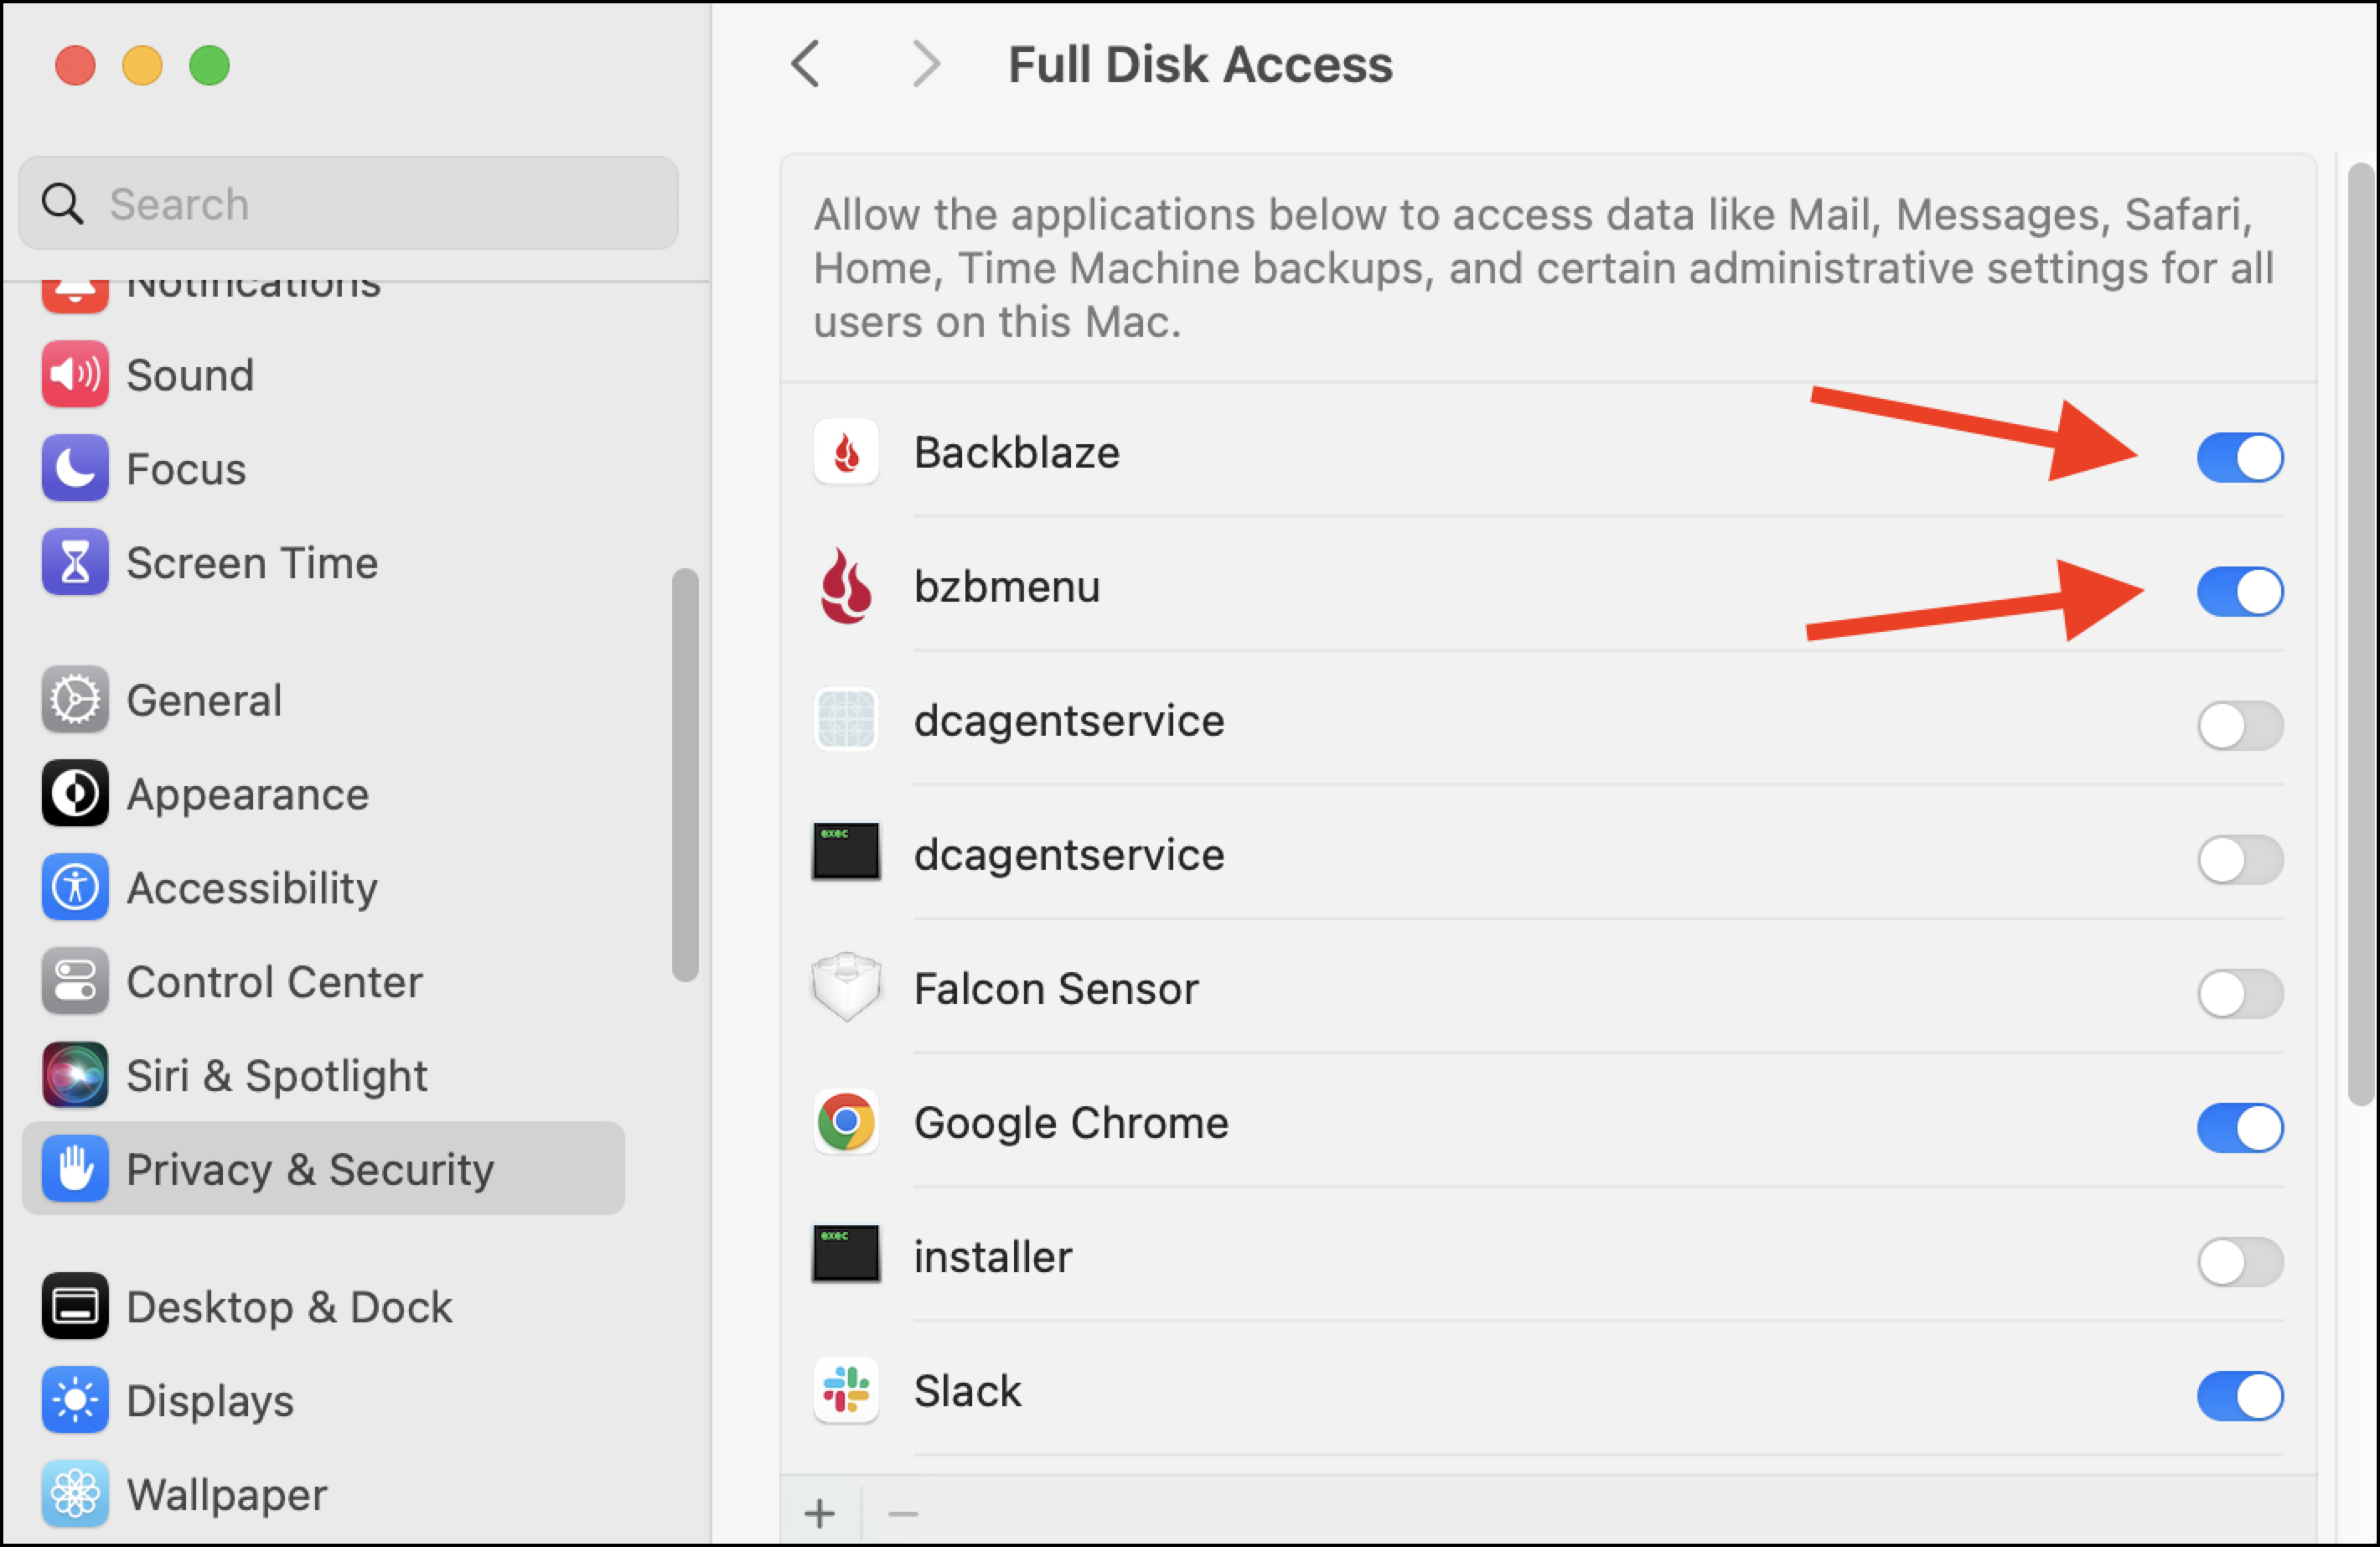
- On your Mac, navigate to System Settings.
- Click Privacy & Security.
- Click Full Disk Access.
- Enable full disk access for both Backblaze and bzbmenu.
Older versions of MacOS may use a checkbox instead of a switch, and you may be required to unlock the Full Disk Access window by clicking the padlock. You may be asked for the computer password. - If Backblaze does not appear in the list, use the plus in the lower-left corner of the Full Disk Access window to add it or drag it from the Applications folder.
- Restart your computer.
After Backblaze scans your hard drive, it begins backing up your data as normal.
Configure Full Disk Access to Install the Backup Client for Mojave 10.14 to Catalina 10.15
If your computer is on macOS Mojave 10.14 to Catalina 10.15, ensure that you use the latest version of the client. The initial installation process shows you how to correctly set Full Disk Access.
- Navigate to the Applications Folder.
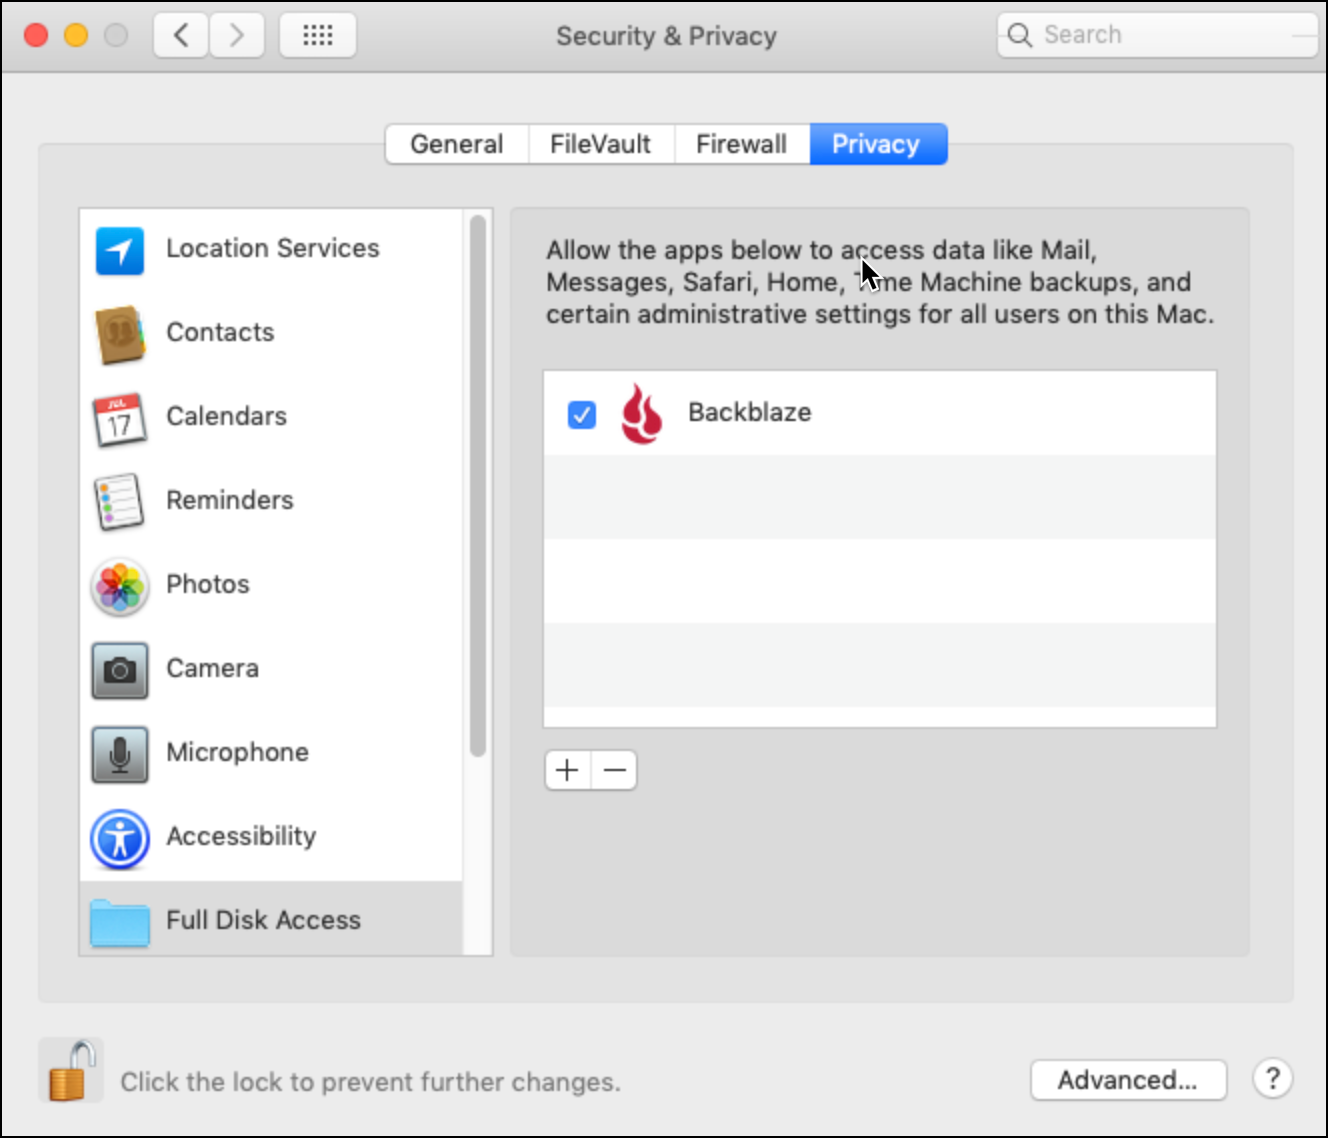
- Click the Apple menu, and select System Preferences.
- Click Security & Privacy, and select Full Disk Access in the left menu.
- Click Open Applications Folder and System Preferences.
- Click the padlock, enter your computer's username and password, and click Unlock.
- Select Backblaze.
- Click the padlock.
After Backblaze scans your hard drive, it begins backing up your data as normal.
Grant Access to External or Secondary Hard Drives for MacOS Catalina 10.15 to Monterey 12
Before you begin: The previous procedures to set up Full Disk Access are also required.
If you have external or secondary hard drives connected to your Mac that you want to back up and your computer is on MacOS Catalina 10.15 to Monterey 12, you must grant "bzbmenu" access to your removable volumes.
Typically, MacOS displays a dialog box that asks whether you want to grant "bzbmenu" permission to read your external or secondary hard drives. If you see this dialog, click Yes or Allow and no further steps are required.
However, if you click No, follow this procedure.
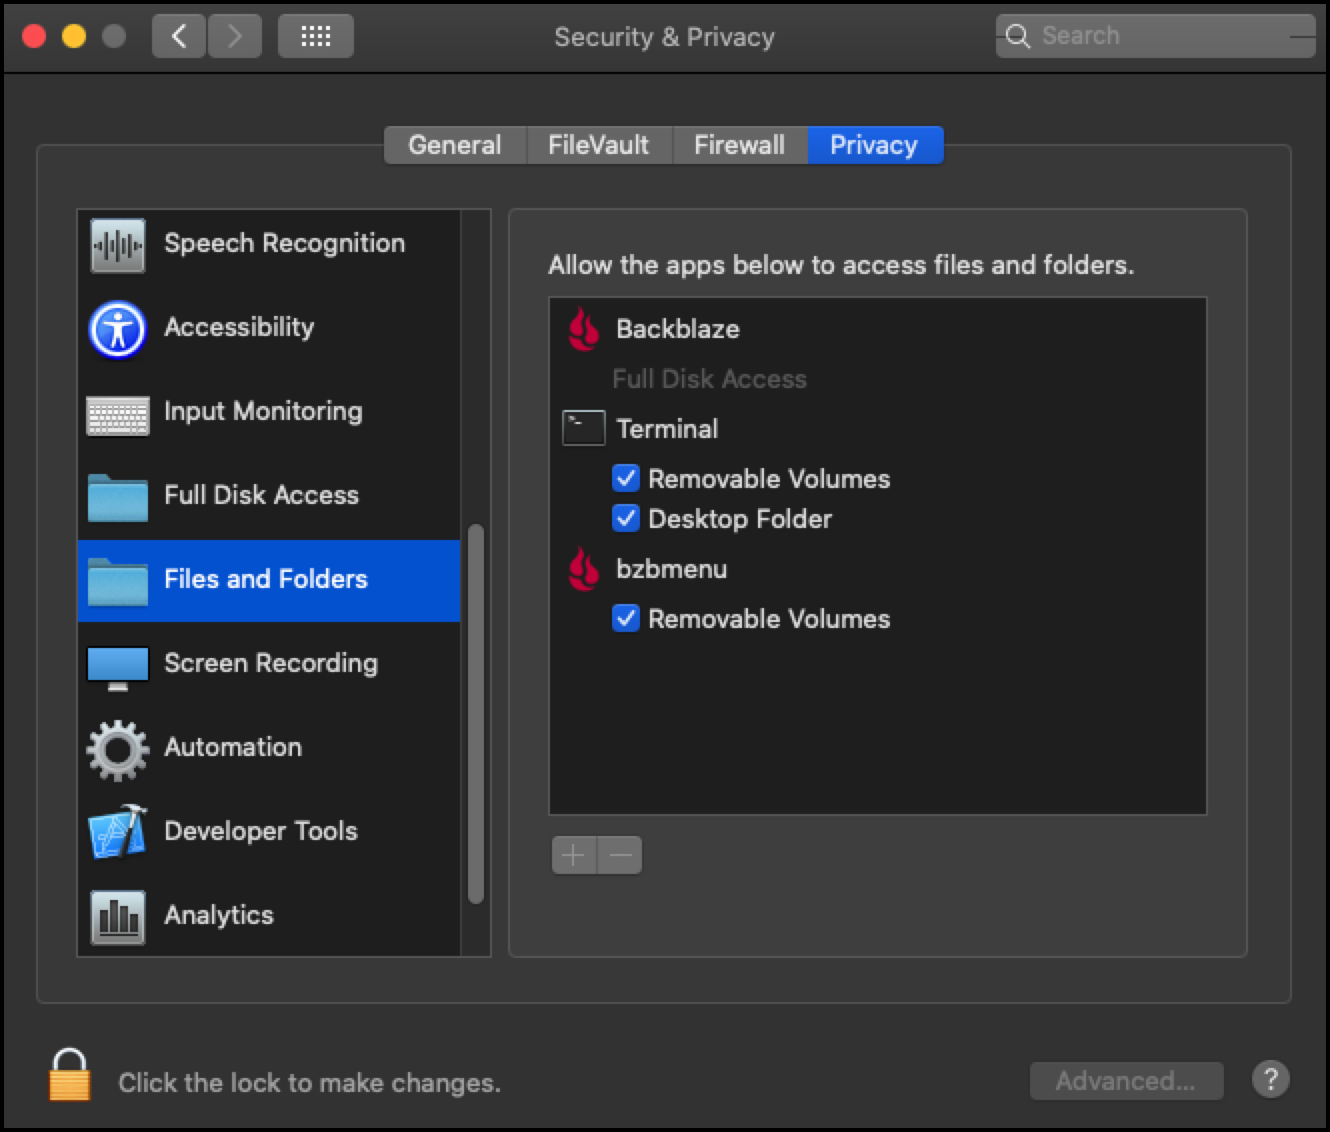
- Open System Preferences, and navigate to System Settings.
- Select Privacy, and select Files and Folders.
- Click the padlock to make changes.
- Under bzbmenu, select Removable Volumes.
- Connect all of the selected external drives to your computer to allow "bzbmenu" to verify access on each individual drive, or you may continue to see the dialog after you grant permission.
- Open the Backblaze Client Preferences.
- In the Settings tab, ensure that the drives you want to back up are listed and selected.
Was this article helpful?