AI is really having a moment. There’s DALL-E, Lensa, ChatGPT. Your social media feed is probably full of new avatars and AI-generated haiku. Naturally, we at Backblaze were intrigued by this brave new world of AI-generated content. The technology has been wildly popular, but is not without controversy, raising questions about intellectual property, copyright law, artist disenfranchisement, possible displacement of jobs, and general fear over the rise of the machines. On the other side of that coin, there’s definitely a place for AI in the future of work and life. So, I wanted to experiment with it.
Let’s start with Stable Diffusion.
Stable Diffusion is one of the new text-to-image technologies popping up all over the internet that allows users to input words and phrases and get back amazing pictures created by its deep learning model. What makes Stable Diffusion so interesting is that it has been open sourced to allow anyone to create their own models for text-to-image generation.
Today, I’ll walk through how you can do just that using Backblaze B2 Cloud Storage.
Kicking the Stable Diffusion Tires
After playing with an online instance of Stable Diffusion, I sought out content on some more ways to use the AI tool. I found several examples of how to use Stable Diffusion with your own images like this one and this one. The most common use case for this was taking advantage of AI to create art from a model based on your own face. Sounds cool, right? But what if I also had a bunch more pictures in Backblaze B2 Cloud Storage? Could I do the same thing to create art, graphics, branded images, and more, from my content in the cloud? The answer is a resounding YES.
Use Cases for Stable Diffusion
For me, this was a fun experiment, but we see a number of different ways this set up could be used both individually and for businesses. I started with about 20 images or so as fodder for Stable Diffusion’s algorithm. But, that’s just the beginning.
Let’s say you’re a marketing team at a small company. You could use Stable Diffusion’s paid version and get access to hundreds of thousands of random images from Google, but you really only care about analyzing and generating photos that are relevant to your business. So, you run Stable Diffusion in a cloud compute instance and have it analyze a Backblaze B2 Bucket where you store your own library of images, which you’ve probably been collecting for years. Set up that way, you have your own customized AI engine that analyzes and generates only images that are pertinent to your needs, rather than a bunch of images you don’t care about.
In this experiment, I used Google Colab, which worked well for my needs. But for a real implementation, you could use a Backblaze cloud compute partner like Vultr. Egress between Backblaze and Vultr is free, so the analysis won’t cost you anything beyond what it costs to use the two services.
This could be hugely useful for marketing teams, but we also see the value for individuals or businesses who want to keep their data private but still take advantage of AI technology. This way, you aren’t serving up images on public sites.
So, how does it all work? Let’s get into it.
Getting Started with Stable Diffusion and Backblaze B2
What you’ll need:
- A Backblaze B2 account. You can sign up for free here.
- A Google account.
- A smartphone to take pictures if you don’t have 20 or so pictures of whatever subject you want to use lying around.
- Whatever software tool you’d like to use to mount Backblaze B2 as a drive on your computer. I use Rclone in this example but any cloud drive software will work.
The first thing you’ll need to do is create an account at Hugging Face. Hugging Face is the home of the modern AI community and is where Stable Diffusion lives. In your Hugging Face account, navigate to your Account Settings and go to Access Tokens—we’ll need one of these to allow our environment to use the Stable Diffusion engines.
Now as to the environment, this can be on your own computer, in a virtual machine (VM), really wherever. My favorite (and free) method I found was a Google Colab notebook created by GitHub user TheLastBen that makes the process so incredibly simple that anyone can do this. The Colab notebook also takes advantage of DreamBooth, a Google Research project that provides for incredible detail on the art and images created by a diffusion model. In short, this is the easiest way to get really good looking AI art. You can get started with the Colab notebook here.
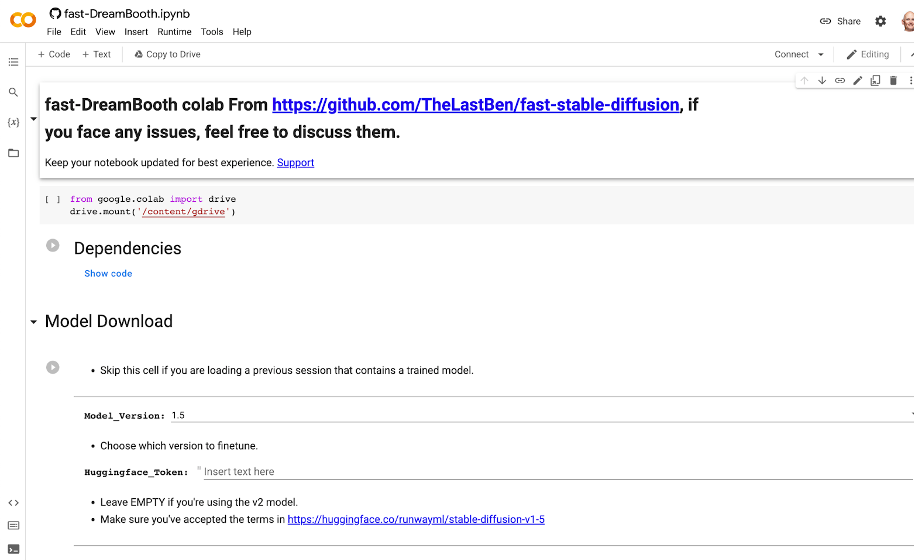
In the Colab notebook there are a ton of different options and a great step-by-step guide that explains them, but I’ll walk you through the basic settings to get going:
- First, hit the Play button next to Dependencies.
- Once that’s done, copy your User Access Token from your Hugging Face account.
- In the Model Download section, paste that User Access Token into the Huggingface_Token field.
- Click the Play button for Model Download.
- You’ll see the script run below all the fields here. You can proceed when you see “DONE!”
- Finally, in the Dreambooth section, provide a name in the Session_Name field. This will be the name of the session that gets saved in your Google Drive. That name can be reused later to skip these steps next time.
Training the Stable Diffusion Model
Now the pictures: You’ll want at least 20 pictures or so for your AI model to analyze in order to avoid creating a bunch of generic person art or nightmare fuel. So bust out your phone and take some selfies! If you have a friend to throw in two or three full body pictures this will help as well. A few optional tips:
- Use different expressions and angles.
- Use different backgrounds if you can.
- Use a square or 1:1 ratio setting. By default, Stable Diffusion’s default image size is 512 x 512 pixels, so using square images makes your input more similar to your desired output.
If you’re an iPhone user, you will need to take one extra step here to save your files in JPEG format. You can find a guide for that in this article.
As you save your photos, make sure the file names include the name you’re going to use when generating your AI art. For example, my photos were all named troy (1).jpg, troy (2).jpg, troy (3).jpg, etc. This is important so that the AI understands what to call you (or your subject) when generating your images.
Once you have your photos, it’s time to upload them to a Bucket in Backblaze B2 Cloud Storage. You can easily do this in the Backblaze mobile app or on the Backblaze website.
With your selfies safely in Backblaze B2, make sure you make them accessible on your computer using a tool such as Rclone mount. If you don’t have an account yet, you can check out our guide on how to set up and configure Rclone mount.
You might be wondering why you should upload the photos to a Backblaze B2 Bucket and then mount the Bucket so that we can access it locally, rather than just saving the files to a local folder?
The answer is simple. In this example, we’re working with a few images representing a single subject, so you likely won’t have issues working from your local drive. As you further experiment with more subjects and more images of each subject, you’ll likely outgrow your local drive. Backblaze B2 Cloud Storage scales infinitely so you won’t have to worry about running out of space.
Now, back to the Colab notebook, hit the play button on Instance Images and click the button that shows up to Choose Files. In the pop up, choose your mounted instance of your B2 Bucket and select the photos.
Once they are uploaded, skip the Concept Images section and click the play button for Training. If you’ve done everything right, you should see some ASCII art like this:
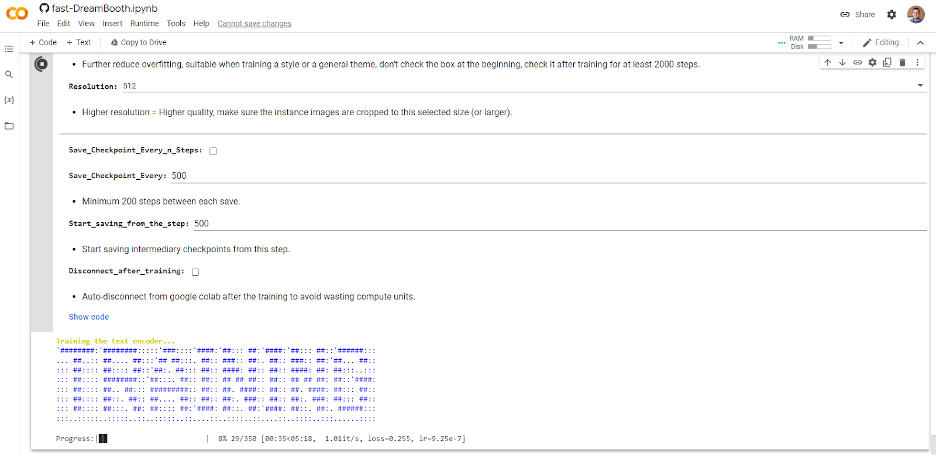
Depending on how many photos you selected, this can take some time. So grab a coffee, go for a walk, listen to a podcast, or perhaps all three.
Creating Your Own AI-Generated Masterpieces
Once complete, click the Play button under Test the Trained Model. This will launch a temporary instance of Stable Diffusion with your new custom model in Gradio, which is an open-source Python library for running machine learning apps. Click the Gradio link generated and we’re ready to start making some AI art.
Again, there are a ton of options and configurations but all you really need to do at this point is enter some text into the Prompt box and click the big Generate button.
Creating prompts for AI art is quickly becoming its own art form. There are tons of resources out there to inspire you, but here are a few prompts I used along with the resulting art.
Pro Tip: You may need to click the Generate button a few times if something looks off. This is totally normal—your new AI friend is learning over time, and it does this by repeating the generation process.
Prompt: “Photo of troy digital painting”
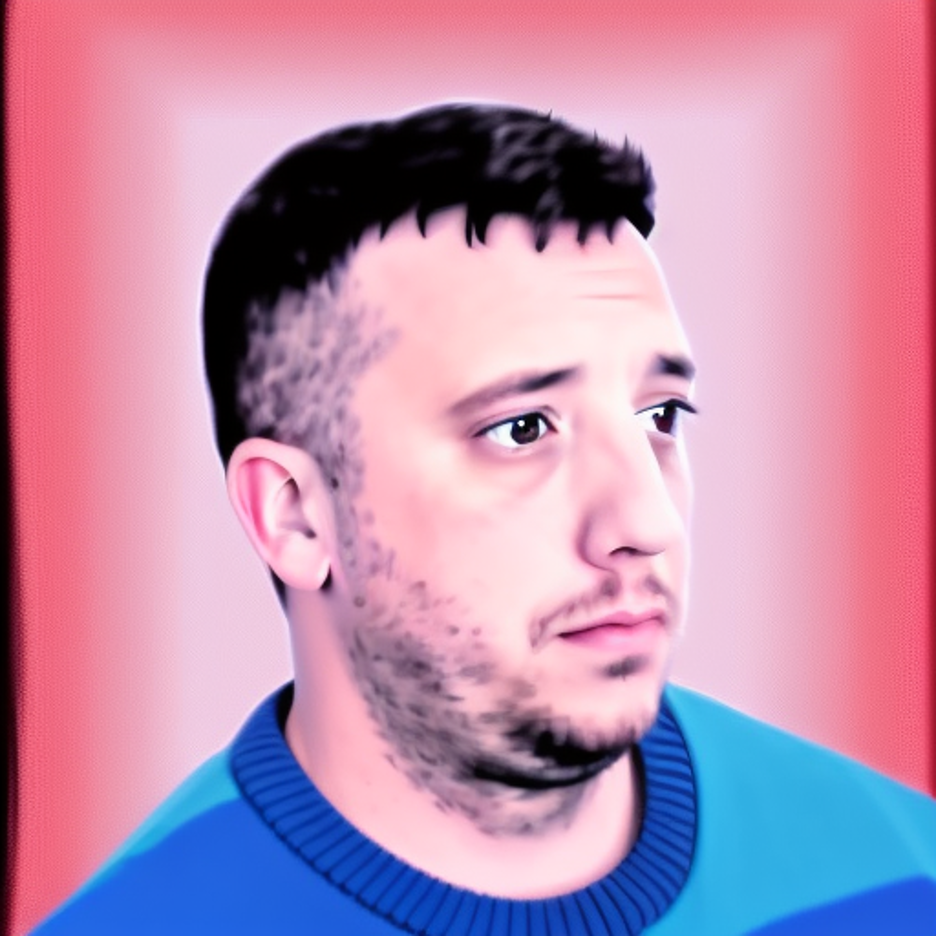
Prompt: “Photo of troy person digital painting”
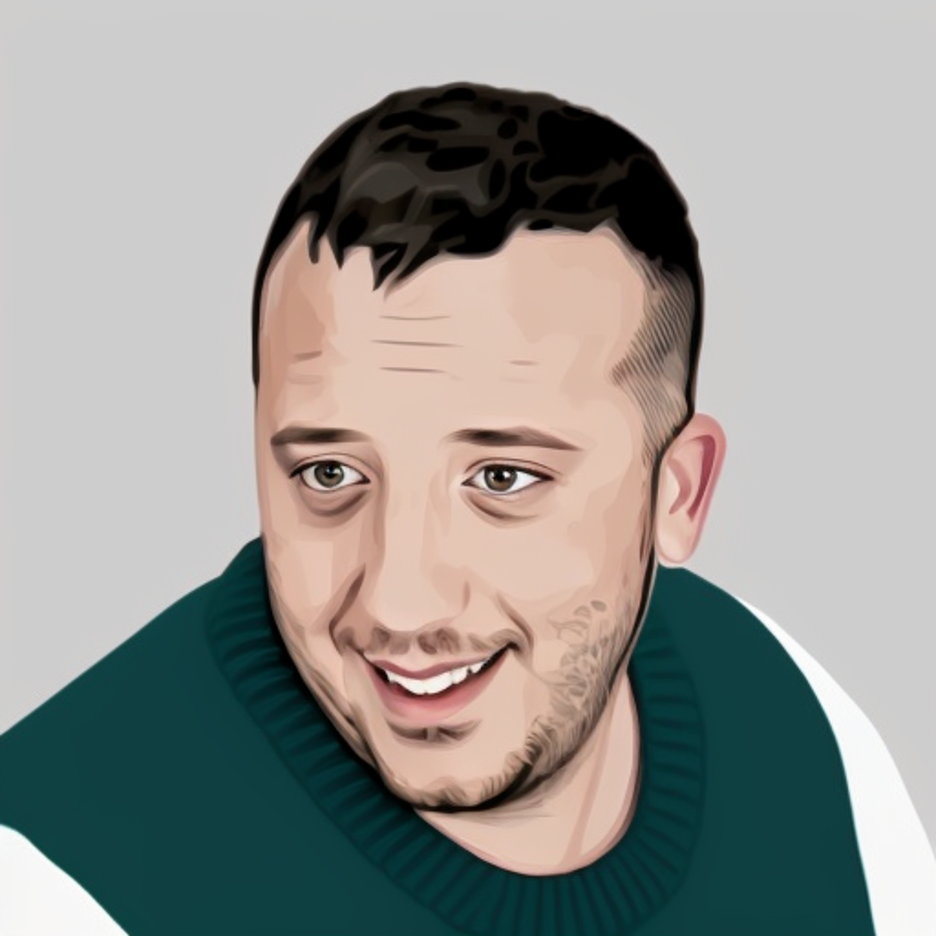
Prompt: “Photo of troy person digital painting asymmetrical headshot smiling”
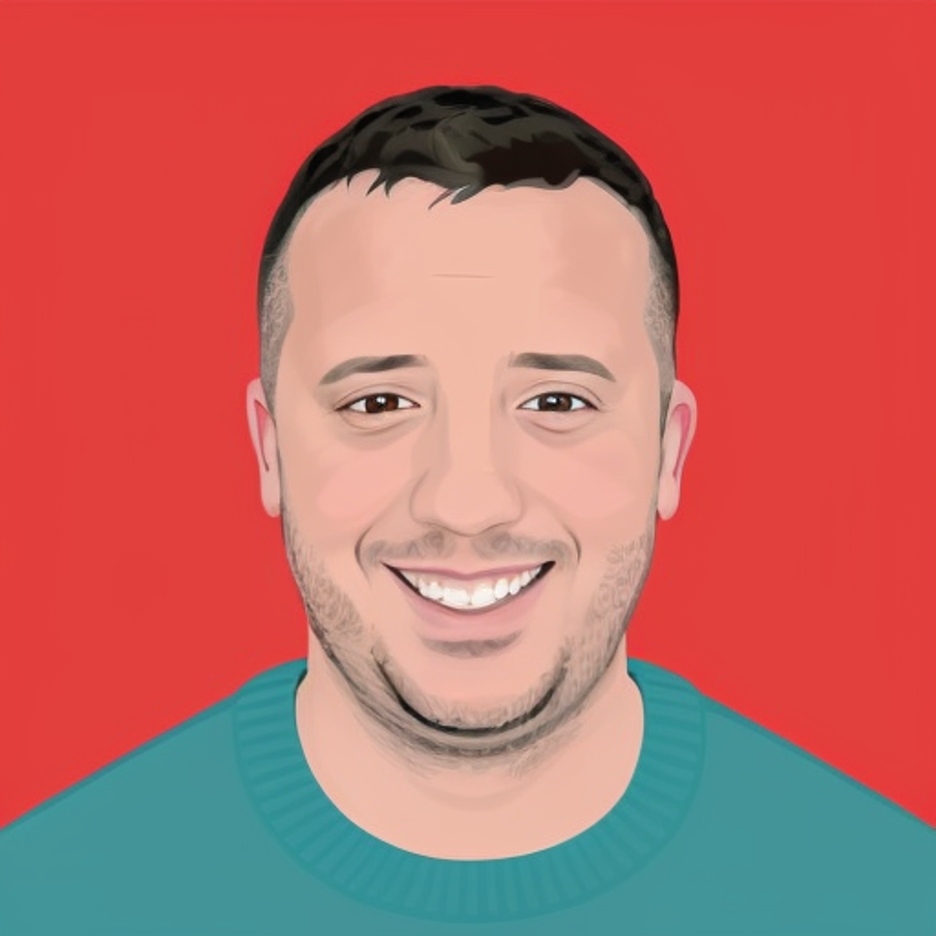
And finally for something fun…
Prompt: ”photo of troy person hand-drawn cartoon”
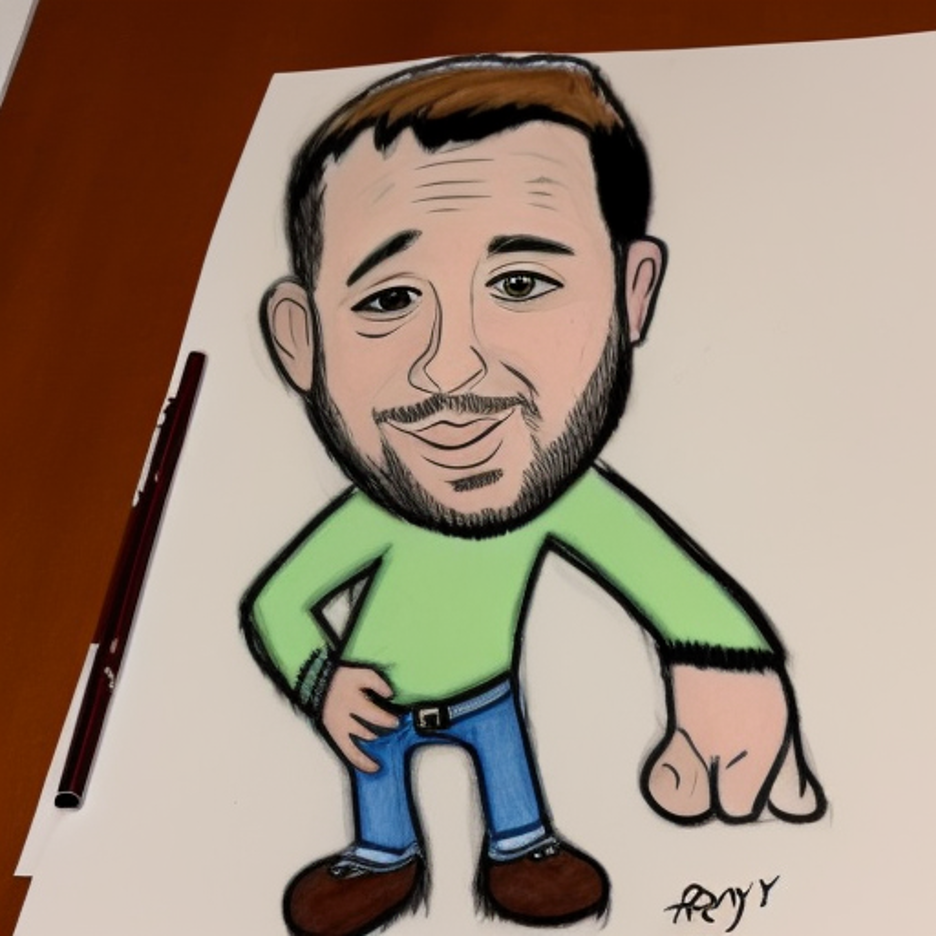
It even has an artist signature! Although I’m not sure who fRny Y is?
So, there you have it. Your very own AI engine, customized to generate versions of your face (or your library of images).
Good luck to all the budding AI artists out there. If you give this a try, we’d love to see your images on social media. You can find us @backblaze on Twitter, Facebook, and LinkedIn. I look forward to seeing what you all create!


