Rclone is described as the “Swiss Army chainsaw” of storage movement tools. While it may seem, at first, to be a simple tool with two main commands to copy and sync data between two storage locations, deeper study reveals a hell of a lot more. True to the image of a “Swiss Army chainsaw,” rclone contains an extremely deep and powerful feature set that empowers smart storage admins and workflow scripters everywhere to meet almost any storage task with ease and efficiency.

Rclone—rsync for cloud storage—is a powerful command line tool to copy and sync files to and from local disk, SFTP servers, and many cloud storage providers. Rclone’s Backblaze B2 Cloud Storage page has many examples of configuration and options with Backblaze B2.
Continued Steps on the Path to rclone Mastery
In our in-depth webinar with Nick Craig-Wood, developer and principal maintainer of rclone, we discussed a number of power moves you can use with rclone and Backblaze B2. This post takes it a number of steps further with five more advanced techniques to add to your rclone mastery toolkit.
Have you tried these and have a different take? Just trying them out for the first time? We hope to hear more and learn more from you in the comments.
Use --track-renames to Save Bandwidth and Increase Data Movement Speed
If you’re moving files constantly from disk to the cloud, you know that your users frequently re-organize and rename folders and files on local storage. Which means that when it’s time to back up those renamed folders and files again, your object storage will see the files as new objects and will want you to re-upload them all over again.
Rclone is smart enough to take advantage of Backblaze B2 Native APIs for remote copy functionality, which saves you from re-uploading files that are simply renamed and not otherwise changed.
By specifying the --track-renames flag, rclone will keep track of file size and hashes during operations. When source and destination files match, but the names are different, rclone will simply copy them over on the server side with the new name, saving you having to upload the object again. Use the --progress or --verbose flags to see these remote copy messages in the log.
rclone sync /Volumes/LocalAssets b2:cloud-backup-bucket \
–track-renames –progress –verbose
2020-10-22 17:03:26 INFO : customer artwork/145.jpg: Copied (server side copy)
2020-10-22 17:03:26 INFO : customer artwork//159.jpg: Copied (server side copy)
2020-10-22 17:03:26 INFO : customer artwork/163.jpg: Copied (server side copy)
2020-10-22 17:03:26 INFO : customer artwork/172.jpg: Copied (server side copy)
2020-10-22 17:03:26 INFO : customer artwork/151.jpg: Copied (server side copy)
--track-renames flag, you’ll see messages like these when the renamed files are simply copied over directly to the server instead of having to re-upload them.
Easily Generate Formatted Storage Migration Reports
When migrating data to Backblaze B2, it’s good practice to inventory the data about to be moved, then get reporting that confirms every byte made it over properly, afterwards.
For example, you could use the rclone lsf -R command to recursively list the contents of your source and destination storage buckets, compare the results, then save the reports in a simple comma-separated-values (CSV) list. This list is then easily parsable and processed by your reporting tool of choice.
rclone lsf --csv --format ps amzns3:/customer-archive-source | rclone lsf --csv --format ps b2:/customer-archive-destination |
You can even feed the results of regular storage operations into a system dashboard or reporting tool by specifying JSON output with the --use-json-log flag.
In the following example, we want to build a report listing missing files in either the source or the destination location:

The resulting log messages make it clear that the comparison failed. The JSON format lets me easily select log warning levels, timestamps, and file names for further action.
{“level”:”error”,”msg”:”File not in parent bucket path customer_archive_destination”,”object”:”216.jpg”,”objectType”:”*b2.Object”,”source”:”operations
/check.go:100″,”time”:”2020-10-23T16:07:35.005055-05:00″}
{“level”:”error”,”msg”:”File not in parent bucket path customer_archive_destination”,”object”:”219.jpg”,”objectType”:”*b2.Object”,”source”:”operations
/check.go:100″,”time”:”2020-10-23T16:07:35.005151-05:00″}
{“level”:”error”,”msg”:”File not in parent bucket path travel_posters_source”,”object”:”.DS_Store”,”objectType”:”*b2.Object”,”source”:”operations
/check.go:78″,”time”:”2020-10-23T16:07:35.005192-05:00″}
{“level”:”warning”,”msg”:”12 files missing”,”object”:”parent bucket path customer_archive_destination”,”objectType”:”*b2.Fs”,”source”:”operations
/check.go:225″,”time”:”2020-10-23T16:07:35.005643-05:00″}
{“level”:”warning”,”msg”:”1 files missing”,”object”:”parent bucket path travel_posters_source”,”objectType”:”*b2.Fs”,”source”:”operations
/check.go:228″,”time”:”2020-10-23T16:07:35.005714-05:00″}
{“level”:”warning”,”msg”:”13 differences found”,”object”:”parent bucket path customer_archive_destination”,”objectType”:”*b2.Fs”,”source”:”operations
/check.go:231″,”time”:”2020-10-23T16:07:35.005746-05:00″}
{“level”:”warning”,”msg”:”13 errors while checking”,”object”:”parent bucket path customer_archive_destination”,”objectType”:”*b2.Fs”,”source”:”operations
/check.go:233″,”time”:”2020-10-23T16:07:35.005779-05:00″}
{“level”:”warning”,”msg”:”28 matching files”,”object”:”parent bucket path customer_archive_destination”,”objectType”:”*b2.Fs”,”source”:”operations
/check.go:239″,”time”:”2020-10-23T16:07:35.005805-05:00″}
2020/10/23 16:07:35 Failed to check with 14 errors: last error was: 13 differences found
Use a Static Exclude File to Ban File System Lint
While rclone has a host of flags you can specify on the fly to match or exclude files for a data copy or sync task, it’s hard to remember all the operating system or transient files that can clutter up your cloud storage. Who hasn’t had to laboriously delete macOS’s hidden folder view settings (.DS_Store), or Window’s ubiquitous thumbnails database from your pristine cloud storage?
By building your own customized exclude file of all the files you never want to copy, you can effortlessly exclude all such files in a single flag to consistently keep your storage buckets lint free.
In the following example, I saved a text file under my user directory’s rclone folder and call it with --exclude-from rather than using --exclude (as I would if filtering on the fly):
rclone sync /Volumes/LocalAssets b2:cloud-backup-bucket \
–exclude-from ~/.rclone/exclude.conf
.DS_Store
.thumbnails/**
.vagrant/**
.gitignore
.git/**
.Trashes/**
.apdisk
.com.apple.timemachine.*
.fseventsd/**
.DocumentRevisions-V100/**
.TemporaryItems/**
.Spotlight-V100/**
.localization/**
TheVolumeSettingsFolder/**
$RECYCLE.BIN/**
System Volume Information/**
exclude.conf that lists all of the files you explicitly don’t want to ever sync or copy, including Apple storage system tags, Trash files, git files, and more.
Mount a Cloud Storage Bucket or Folder as a Local Disk
Rclone takes your cloud-fu to a truly new level with these last two moves.
Since Backblaze B2 is active storage (all contents are immediately available) and extremely cost-effective compared to other media archive solutions, it’s become a very popular archive destination for media.
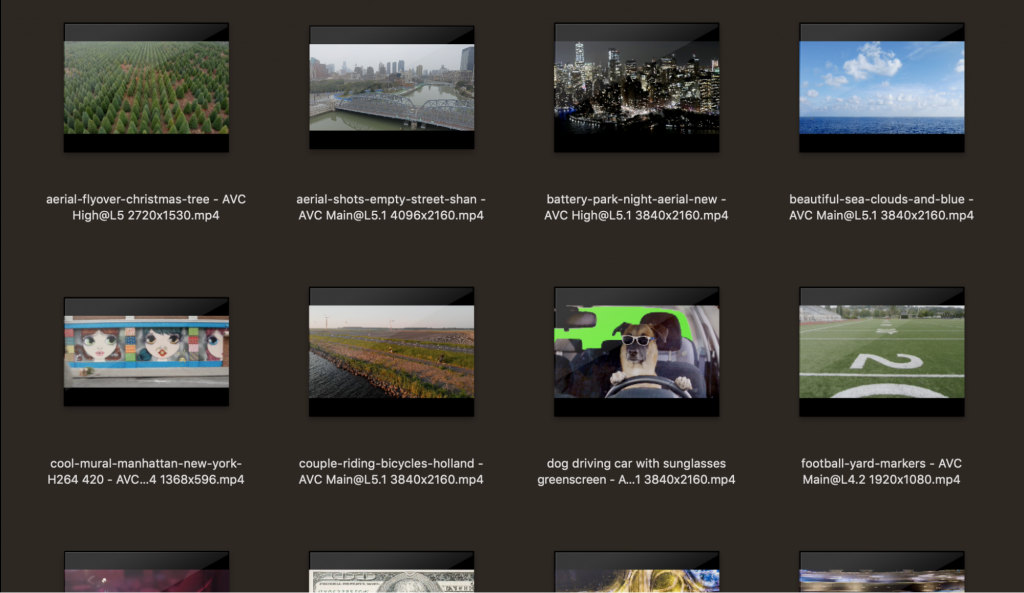
If you mount extremely large archives as if they were massive, external disks on your server or workstation, you can make visual searching through object storage, as well as a whole host of other possibilities, a reality.
For example, suppose you are tasked with keeping a large network of digital signage kiosks up-to-date. Rather than trying to push from your source location to each and every kiosk, let the kiosks pull from your single, always up-to-date archive in Backblaze!
With FUSE installed on your system, rclone can mount your cloud storage to a mount point on your system or server’s OS. It will appear instantly, and your OS will start building thumbnails and let you preview the files normally.
rclone mount b2:art-assets/video ~/Documents/rclone_mnt/

Behind the scenes, rclone’s clever use of VFS and caching makes this magic happen. You can tweak settings to more aggressively cache the object structure for your use case.
Serve Content Directly From Cloud Storage With a Pop-up Web or SFTP Server
Many times, you’re called on to give users temporary access to certain cloud files quickly. Whether it’s for an approval, a file hand off, or whatever, this requires thinking about how to get the file to a place where the user can have access to it with tools they know how to use. Trying to email a 100GB file is no fun, and spending the time to download and move it to another system that the user can access can take up a lot of time.
Or perhaps you’d like to set up a simple, uncomplicated way to let users browse a large PDF library of product documents. Instead of moving files to a dedicated SFTP or web server, simply serve them directly from your cloud storage archive with rclone using a single command.
Rclone’s serve command can present your content stored with Backblaze via a range of protocols as easy for users to access as a web browser—including FTP, SFTP, WebDAV, HTTP, HTTPS, and more.
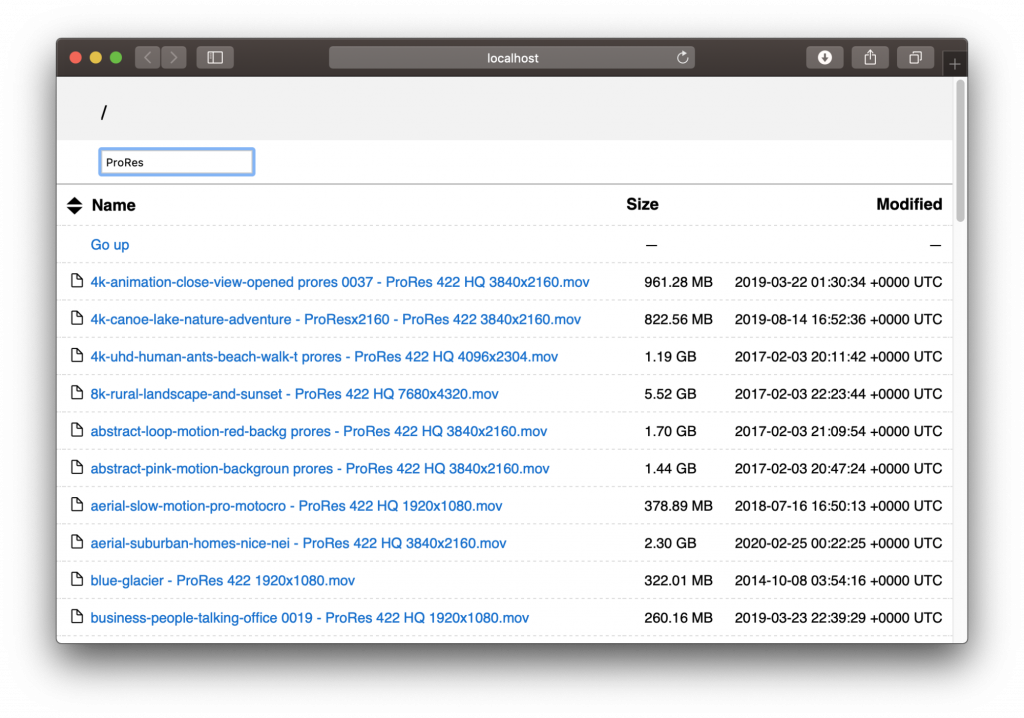
In the following example, I export the contents of the same folder of high-resolution video used above and present it using the WebDAV protocol. With zero HTML or complicated server setups, my users instantly get web access to this content, and even a searchable interface:
rclone serve b2:art_assets/video
2020/10/23 17:13:59 NOTICE: B2 bucket art_assets/video: WebDav Server started on http://127.0.0.1:8080/

For more advanced needs, you can choose the HTTP or HTTPS option and specify custom data flags that populate web page templates automatically.
Continuing Your Study
Combined with our rclone webinar, these five moves will place you well on your path to rclone storage admin mastery, letting you confidently take on complicated data migration tasks with an ease and efficiency that will amaze your peers.
We look forward to hearing of the moves and new use cases you develop with these tools.


