FileVault keeps your data safe if your Mac is ever stolen or lost by encrypting the hard drive. What does that mean, though? Let’s demystify FileVault and find out more about how it works with things like Backblaze.
What Is FileVault?
FileVault is Apple’s term for disk encryption. It’s been around in its current incarnation since OS X 10.7 Lion shipped in 2011. FileVault secures your Mac’s hard disk using XTS-AES 128 block cipher technology. When FileVault is turned on, you are required to input a password whenever your Mac starts up. Without this password, the data on the hard drive is unrecognizable.
The encryption is linked to a recovery key and a password that are generated at the time the disk is encrypted. Recent versions of OS X have also enabled you to use your iCloud account to unlock the disk. One way or the other, without entering a password, neither you nor anyone else can get any meaningful data from that drive.
This makes FileVault a great choice if you handle sensitive information, or if you are concerned about the security of the data on your Mac if it’s ever lost or stolen. There’s another good reason to use FileVault, too: Apple recommends using it if you want to securely delete data off an SSD-equipped Mac once you stop using it.
When you first set up a new Mac, the initial setup process will ask you if you want to turn on FileVault. By default, it will activate. That’s different than it used to be—the system used to keep FileVault off unless you turned it on.
So you may already be using FileVault even if you don’t know it. Here’s how to check.
- Click on the menu.
- Click on System Preferences.
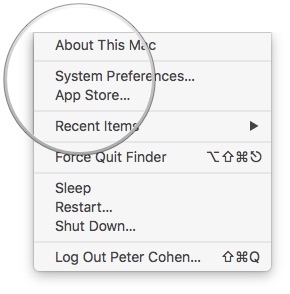
- Click on Security & Privacy.
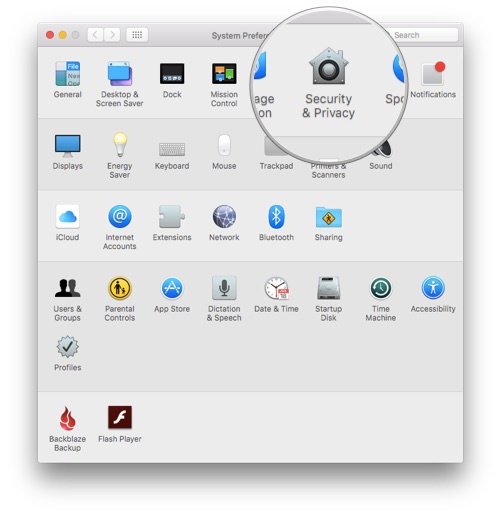
- Click on the FileVault tab.
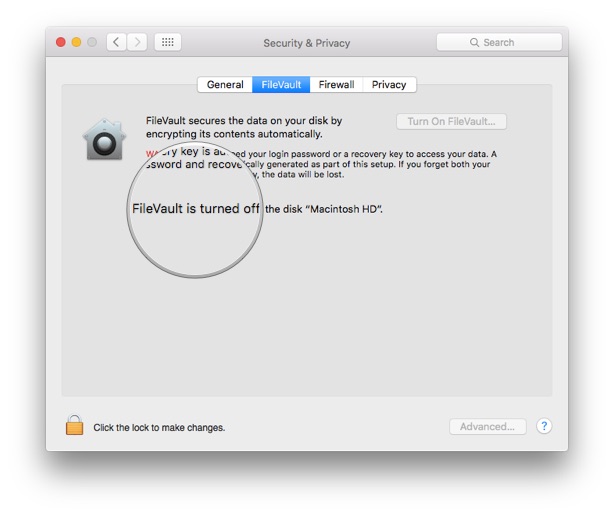


FileVault’s status will be displayed in this window.
Should I Use FileVault?
FileVault protects your data from prying eyes. If you’re using your computer to access sensitive data, or if you just don’t want your information to fall into the wrong hands, FileVault gives you peace of mind you won’t have otherwise.
Having said that, FileVault adds a layer of complexity to the operation of your computer by enforcing a password you have to remember to access the drive. If you have trouble keeping track of passwords, or if you just don’t want to bother, consider your strategy and whether it’s worth the effort.
Last, take a look at your gear. There are a few reasons why Apple’s switched from keeping FileVault off to turning it on by default. Hardware encryption features are baked into the CPU, which makes FileVault faster. Newer Macs mostly use solid state drive (SSD) flash storage in place of spinning hard drives, and that makes a big performance difference, too.
If your Mac is older and still using a hard drive, you may find that FileVault imposes an unreasonable performance hit. Make sure your Mac is up to snuff before turning on FileVault.
Before You Use FileVault
Regardless of whether FileVault was activated when you first set up your Mac, you can turn it on at any time.
There are a couple of practical caveats you should bear in mind.
First of all, be warned that the initial encryption process—and the decryption process, if you should ever need it—will take hours. You’re still able to use your Mac while it happens, because the Mac will set up FileVault in the background, but it’s a process. So Mac laptop users should be prepared to leave their machines running and plugged in to a wall outlet until FileVault’s work is done.
Secondly, and this is purely an anecdotal observation, so feel free to take it with whatever grain of salt you prefer, my experience with FileVault suggests that you’ll probably have an easier time of it if you’re using flash-based storage instead of a regular hard drive. So if your Mac is older and still using a spinning drive, you might want to skip FileVault for now.
Third, be prepared to store that encryption key and make a secure note of that password, because without them, your data is lost. Lost to you, lost forever. If you’re using OS X 10.10 Yosemite or later, you can also recover by entering your iCloud account information, so that’s an extra layer of convenience to fall back on if you need it.
Finally, FileVault is whole-disk encryption. You need to enable users individually so they can unlock the disk by entering their password.
How to Turn on FileVault
If you’re not using FileVault and think that you can benefit from it, here are step by step instructions to turn on FileVault.
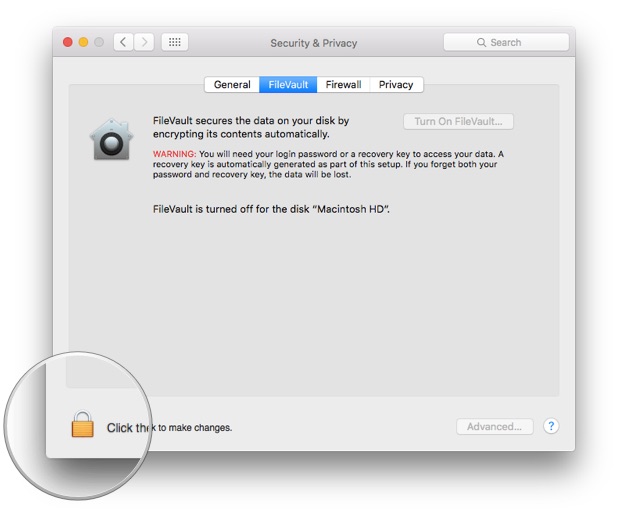
- Click on the menu.
- Click on System Preferences.
- Click on Security & Privacy.
- Click on the FileVault tab.
- Click the lock in the lower right hand corner.
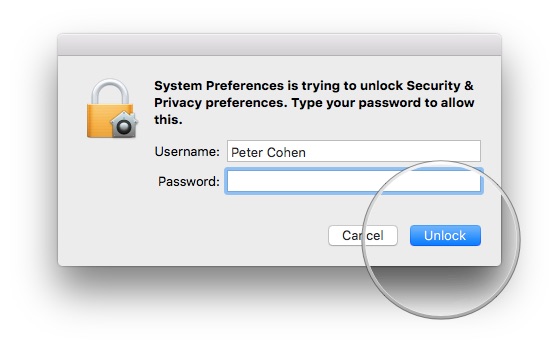
- Enter your administrator password.
- Click the Unlock button.
- Click the Turn On FileVault button.
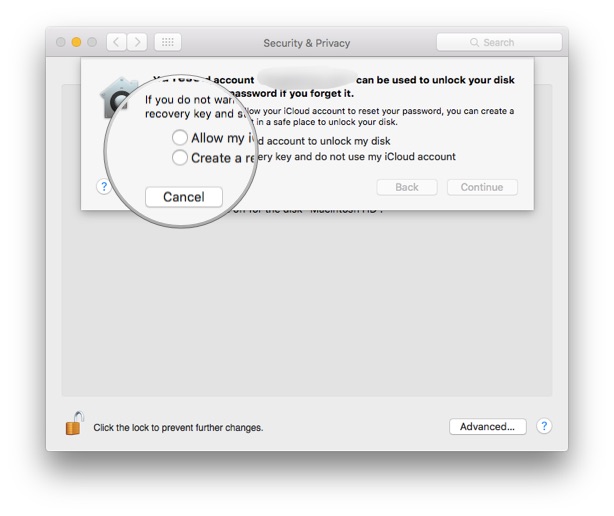
- Apple can link your iCloud account to FileVault if you want to use it to unlock your disk and reset your password. Otherwise, FileVault will generate a recovery key that you will have to keep safe if something should ever go wrong with your password. Choose an option, then click the Continue button.
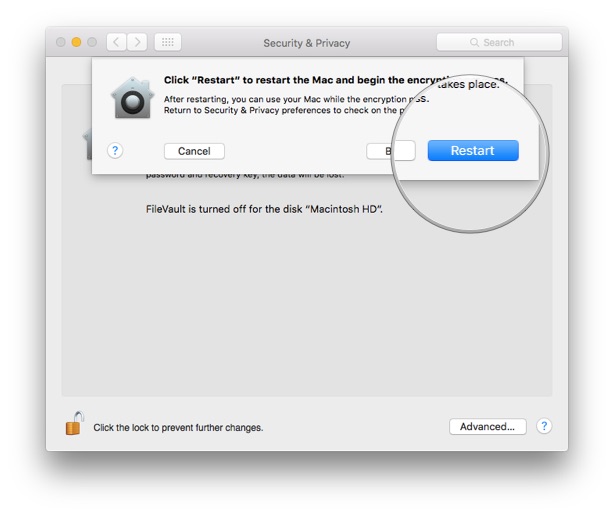
- Click the Restart button to restart your Mac and begin the encryption process. This process will take time, because the computer has to rewrite the contents of your drive. The Mac will continue to operate while it’s happening.


FileVault and the Rest of Your Mac
Once FileVault has encrypted your Mac’s hard disk, you’ll notice that each time you start up your Mac you have to enter the FileVault password to continue. If you had set up your Mac to automatically log in to a specific user or administrator account, it won’t do that anymore. FileVault requires you to enter a password to decrypt the drive.
Once you’ve entered that password, the Mac works like it normally does, with one important exception: Any data written to the Mac’s primary storage system (its internal SSD or hard drive) is encrypted and decrypted on the fly. Your Mac works the same as it did before when copying information over the network, uploading files on the internet, or transferring files to external devices like USB thumb drives, external hard disk drives, or NAS devices.
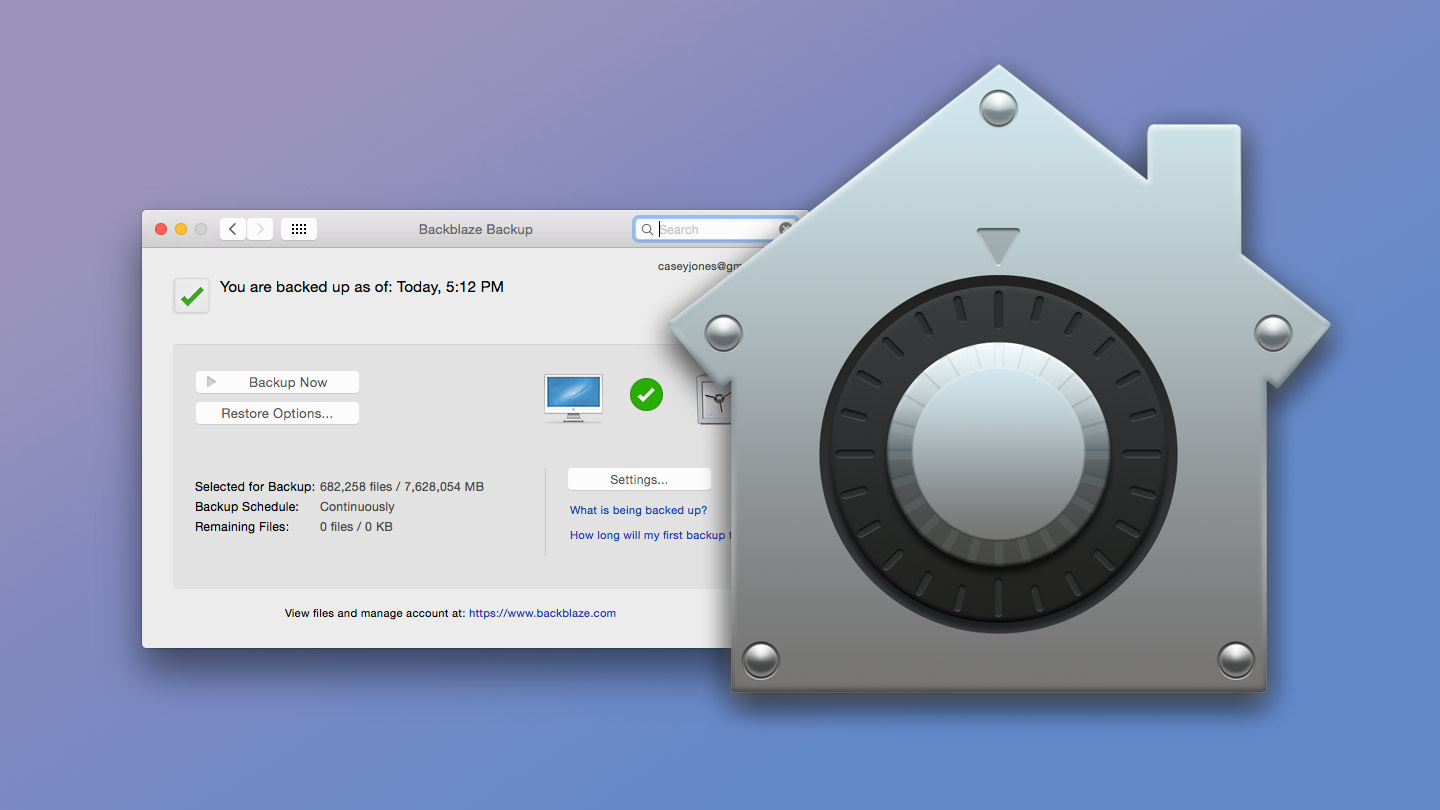
FileVault and Backblaze
The same goes for other software running on your Mac, like Backblaze. The data on your hard drive is safely encrypted. Once you’ve unlocked it, Backblaze operates as it normally does, sending information to our data center where we keep it secure and encrypted as well. So no matter what happens to your Mac and your local backup, your essential data is stored off-site, and you’re able to restore it with just your Backblaze account information.
Because FileVault is Apple’s technology, it’s integrated into the Mac and iCloud user experience in a way that no other security technology can really manage. If you’re looking for seamless, easy to use whole disk encryption, FileVault fits the bill.
Just make sure your Mac is up to snuff before you activate it, and make sure to back up before hand, too—you always want to be prepared for the unexpected. Stick with a 3-2-1 backup strategy that includes primary storage, on-site backup, and off-site backup, and you’re well covered no matter what happens.