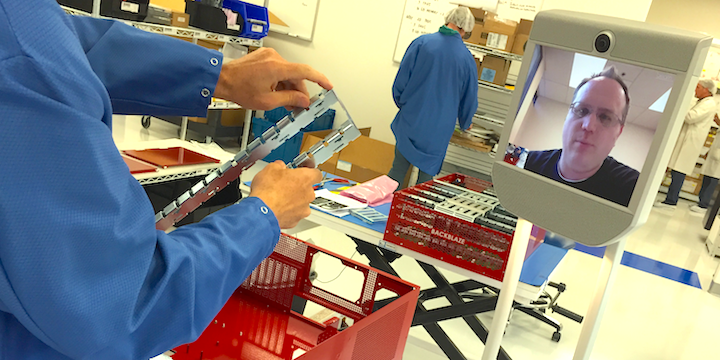
Tim holds up a drive beam and shows the design to Matt, who is attending the meeting courtesy of a telepresence robot. They are discussing the results of a prototype Storage Pod developed using Agile development methodology applied to hardware design. The Storage Pod they are discussing was the result of the fifth sprint (iteration) of prototyping. Based on the evaluation by the Scrum (project) team, the prototype Pod is either sent to the data center for more testing and hopefully deployment, or it is decided that more work is required and the Pod is salvaged for usable parts. Learning from failure, as well as from success, is a key part of the Agile methodology.
Prototyping Storage Pod Design
Backblaze Labs uses the Scrum framework within the Agile methodology to manage the Storage Pod prototyping process. To start, we form a Scrum team to create a product backlog containing the tasks we want to accomplish with the project: redesign drive grids, use tool-less lids, etc. We then divide the tasks into four-week sprints, each with the goal of designing, manufacturing, and assembling one to five production-worthy Storage Pods.
Let’s take a look at some of the tasks on the product backlog that the Scrum team is working through as they develop the next generation Storage Pod.
Drive Grids Become Drive Beams
Each Storage Pod holds 45 hard drives. Previously we used drive grids to hold the drives in place so that they connect to the backplanes. Here’s the process of how drive grids became drive brackets that became drive beams.
| Current Storage Pod 4.5 Design: Each Pod has an upper and lower drive grid. Hard drives are placed in each “bay” of the grid and then a drive cover presses lightly on each row of 15 hard drives to secure them in place. |
 |
| Storage Pod Scrum (Sprint 1) Design: This drive bracket design allowed drives to be easily installed and removed, but didn’t seem to hold the drives well. A good first effort, but a better design was needed. |
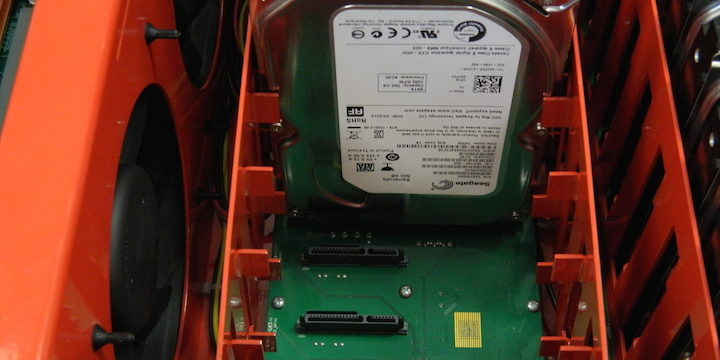 |
| Storage Pod Scrum (Sprint 3) Design: Sprint 3 introduced a new drive beam design. On the plus side, the drives were very secure. On the minus side, the beams sat too high in the chassis, so it was nearly impossible to remove a drive with your fingers. |
 |
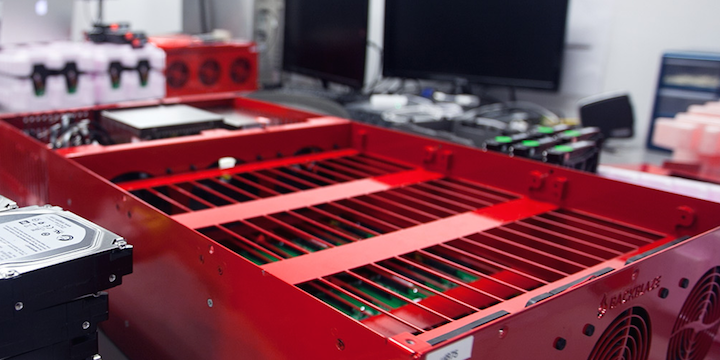
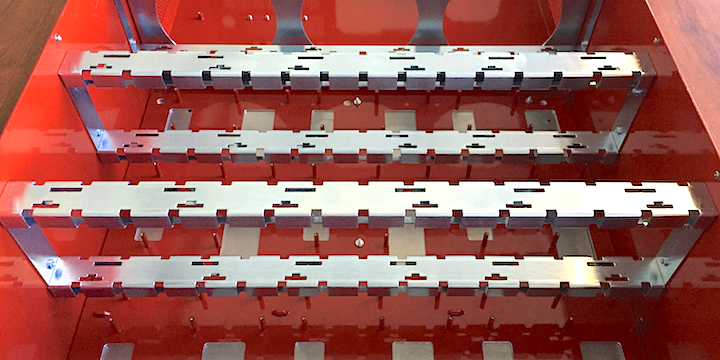
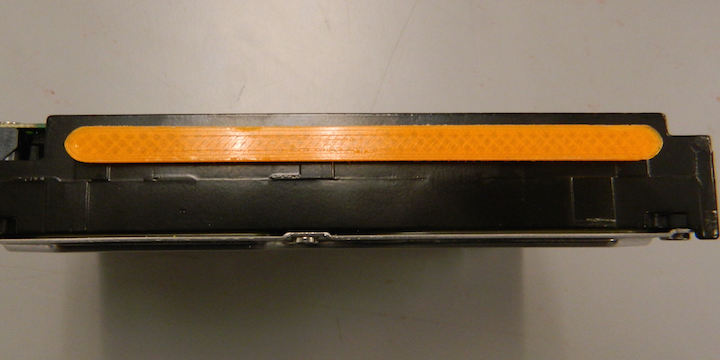
| Storage Pod Scrum (Sprint 5) Design: The height of the drive beams was shortened in Sprint 5, making them low enough so that the hard drives could be removed by using your fingers. |
 |
| Operations Impacts the Design Having Operations personnel on the Scrum team helped get the design of the drive beams right. For the first two sprints, the hard drives installed in the prototypes for testing purposes were small capacity drives. These drives were ¾ inch wide. Once installed, the gap between the drives provided enough space to use your fingers to remove the drives. Matt from Operations suggested that we use large capacity hard drives, like we do in production, to test the prototypes. These drives are one inch wide. When we did this in Sprint 3, we discovered there was no longer enough room between the drives our for fingers. This led to lowering the height of the drive beams in Sprint 5. |
Drive Guides
In conjunction with the introduction of the new drive beam design from Sprint 3, we needed a way to keep the drives aligned and immobile within the beams. Drive guides were the proposed solution. These guides are screwed or inserted into the four mounting holes on each drive. The drive then slides into cutouts on the drive beam securing the drive in place. There were three different drive guide designs:
| Sprint 2: The first design for drive guides was to use screws in the four mounting holes on each drive. The screw head was the right size to slide into the drive beam. Inserting 180 screws into the 45 drives (45 x 4) during assembly was “time expensive” so other solutions were examined. |
|
| Sprint 3: The second design for drive guides was plastic “buttons” that fit into each of the four drive-mounting screw holes. This was a better solution, but when the height of the drive beams was lowered in Sprint 4, the top two drive guide buttons were now above the drive beams with nothing to attach to. |
 |
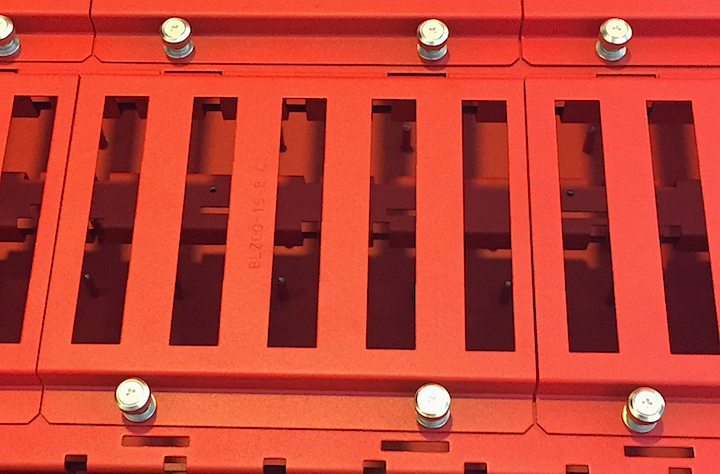
| In Sprint 5, full-length drive guides replaced the buttons, with one guide attached to each side of the drive. The full-length guides allowed the drive to be firmly seated even though the drive beams were made shorter. They had the added benefit of taking much less time to install on the assembly line. |
 |
| Time Versus Money: 3D Printing One lesson learned as we proceeded through the sprints was that we could pay extra to get the parts needed to complete the sprint on time. In other words, we could trade money for time. One example is the drive guides. About halfway through Sprint 5, we created the design for the new full-length drive guides. We couldn’t procure any in time to finish the sprint, so we made them. In fact, we printed them using a 3D printer. At $3 each to print ($270 for all 45 drives), the cost is too high for production, but for prototyping we spent the money. Later, a plastics manufacturer will make these for $0.30 each in a larger quantity—trading time to save money during production. |
Drive Lids
Drive lids were introduced in Storage Pod 3.0 to place a small amount of pressure on the top of the hard drives, minimizing vibrations as they sat in the drive bay. The design worked well, but the locking mechanism was clumsy and the materials and production costs were a bit high.
| Sprint 2: We wanted to make it easier to remove the drive lids yet continue to apply the lid pressure evenly across the drives. This design looked nice, but required six screws to be removed in order to access a row of drives. In addition, the screws could cross-thread and leave metal shards in the chassis. A better solution was needed. |
 |
| Sprint 4: The candidate design was tool-less; there were no screws. This drive lid flexed slightly when pressed so as to fit into cutouts on the drive beams. The Scrum team decided to test multiple designs and metals to see if any performed better and have the results at the next sprint. |
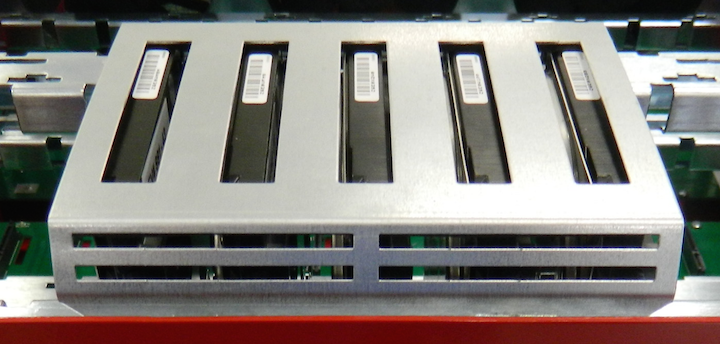 |
| Sprint 5: The team reviewed the different drive lids and selected three different lids to move forward. Nine copies of each drive lid were made, and three Storage Pods were given to operations for testing to see how each of the three drive lids performed. |
 |
Backplane Tray
In Storage Pod 4.5, 3.0, and prior versions, the backplanes were screwed to standoffs attached to the chassis body itself. Assembly personnel on the Scrum team asked if backplanes and all their cables, etc. could be simplified to make assembly easier.
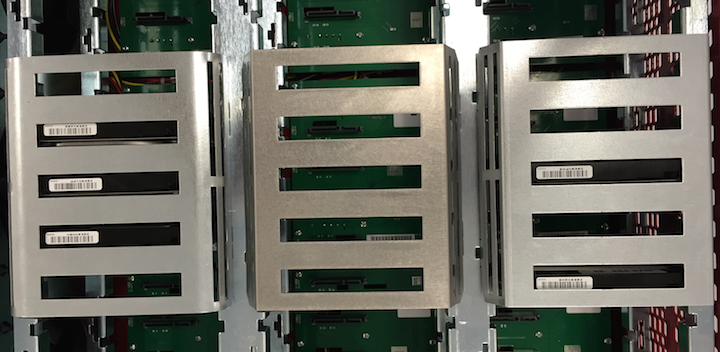
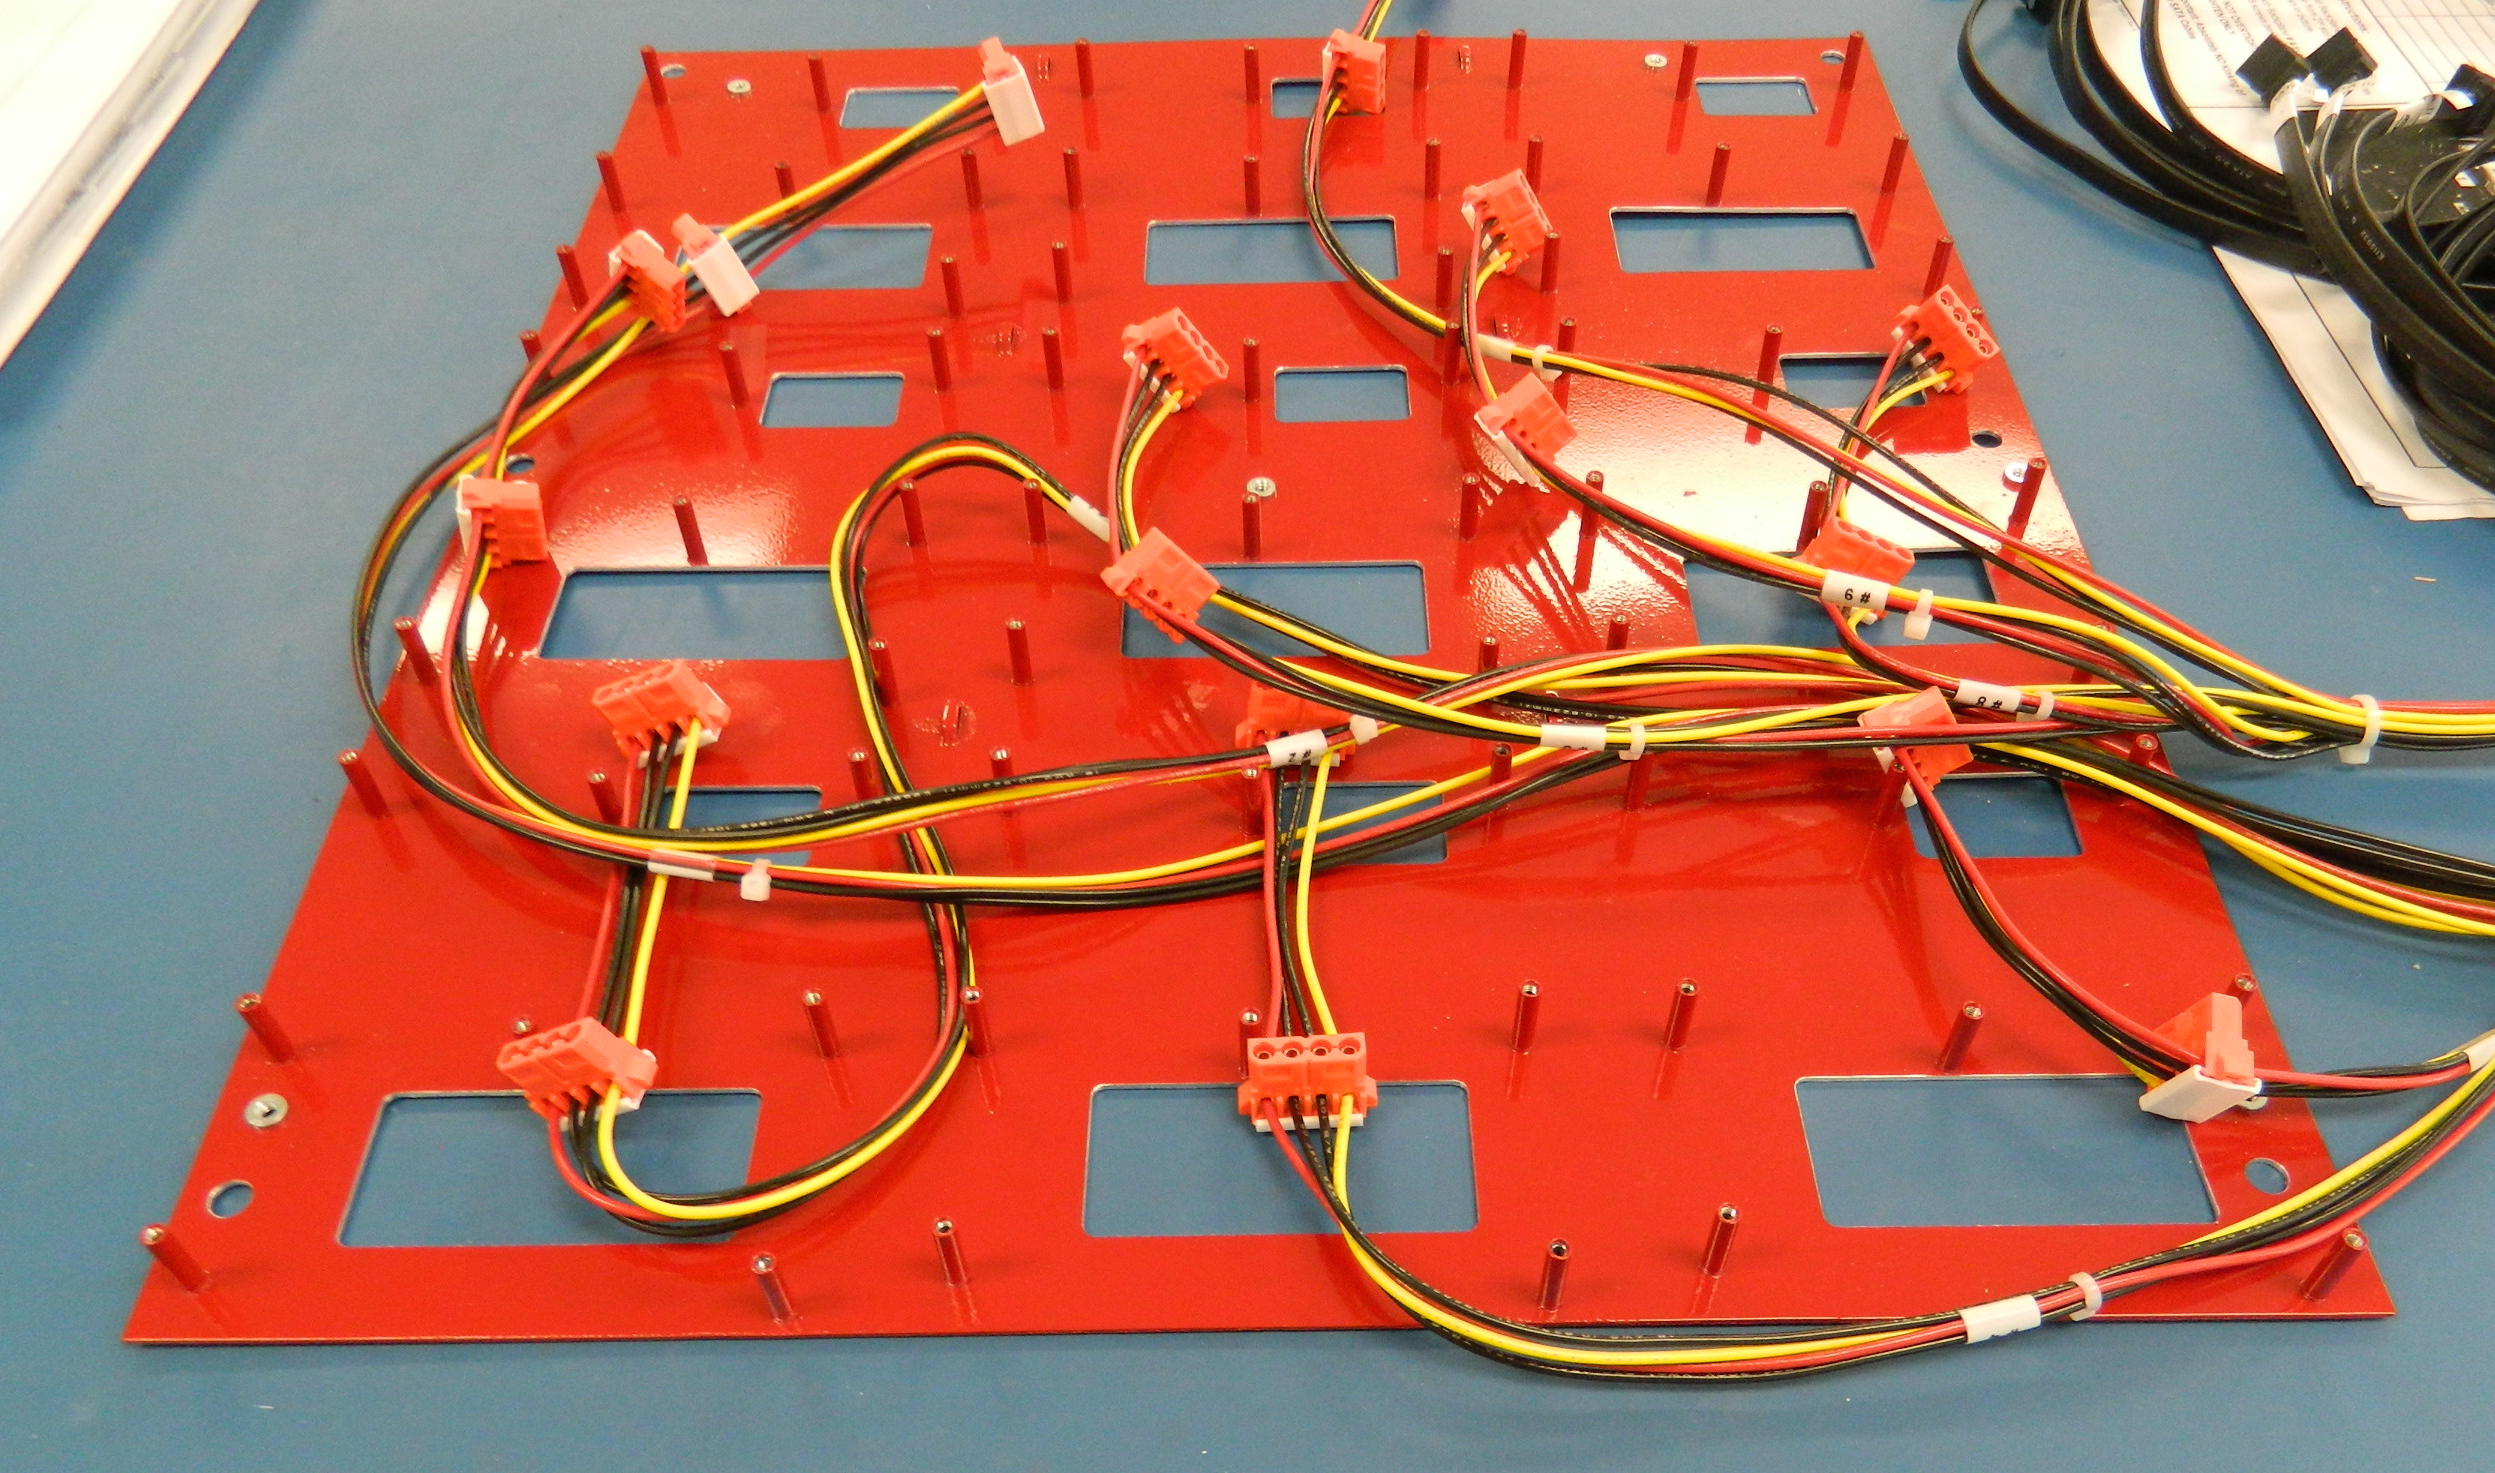
| Sprint 5: The proposed solution was to create a backplane tray on which all the wiring could be installed and then the backplanes attached. The resulting backplane module could be pre-built and tested as a unit and then installed in the Pod in minutes during the assembly process. |
 |
| Sprint 7: The design of the backplane module is still being finalized. For example, variations on the location of wire tie downs and the wiring routes are being designed and tested. |
 |
| Metal Benders Matter One thing that may not be obvious is that the actual Storage Pod chassis, the metal portion, is fabricated from scratch each sprint. Finding a shop that can meet the one-week turnaround time for metal manufacturing required by the sprint timeline is time-consuming, but well worth it. In addition, even though these shops are not directly part of the Scrum team, they can provide input into the process. For example, one of the shops told us that if we made a small design change to the drive beams they could fabricate them out of a single piece of metal and lower the unit production cost by up to half. |
The Scrum Team
Our Storage Pod Scrum team starts with a Scrum master (Ariel/Backblaze), a designer (Petr/Evolve), and a product owner (Tim/Backblaze). Also included on the team are representatives from Assembly (Edgar/Evolve and Greg/Evolve), Operations (Matt/Backblaze), Procurement (Amanda/Evolve), and an executive champion (Rich/Evolve). At the end of each four-week sprint, each person on the team helps evaluate the prototype created during that sprint. The idea is simple: identify and attack issues during the design phase. A good example of this thinking is the way we are changing the Storage Pod lids.
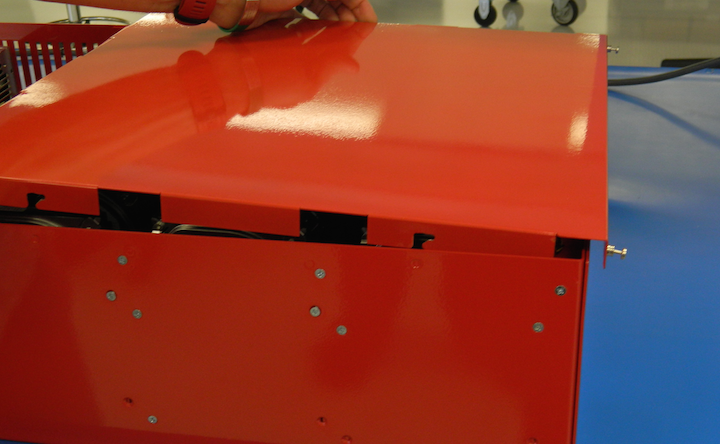
Current Storage Pods require the removal of twelve screws to access the drive bay and another eight screws to access the CPU bay. The screws are small and easy to lose, and they take time to remove and install. Operations suggested tool-less lids be part of the Scrum product backlog and they were introduced in Sprint 3. A couple of iterations (Sprints) later, we have CPU bay and drive bay lids that slide and latch into place and are secured with just two thumb screws each that stay attached to the lid.
Going from Prototype to Production
One of the supposed drawbacks of using Scrum is that is it is hard to know when you are done. Our goal for each sprint is to produce a production-worthy Storage Pod. In reality, this will not be the case, since each time we introduce a major change to a component (drive beams, for example) things break. This is just like doing software development, where new modules often destabilize the overall system until the bugs are worked out. The key is for the Scrum team to capture any feedback and categorize it as: 1) must fix, 2) new idea to save for later, or 3) never mind.
Here’s the high-level process the Scrum team uses to move the Storage Pod design from prototype to production.
- Manufacture one to five Storage Pods chassis per sprint until the original product backlog tasks are addressed and, based on input from Manufacturing, Assembly, and Operations, the group is confident in the new design.
- The Scrum team is responsible for the following deliverables:
- Final product specifications
- Bill of materials
- Final design files
- Final draft of the work instructions (Build Book)
- Negotiate production pricing to manufacture the chassis. This will be done based on a minimum six-month production run.
- Negotiate production pricing to acquire the components used to assemble the Storage Pod: power supplies, motherboards, hard drives, etc. This will be done based on a minimum six-month production run.
Once all of these tasks are accomplished the design can be placed into production.
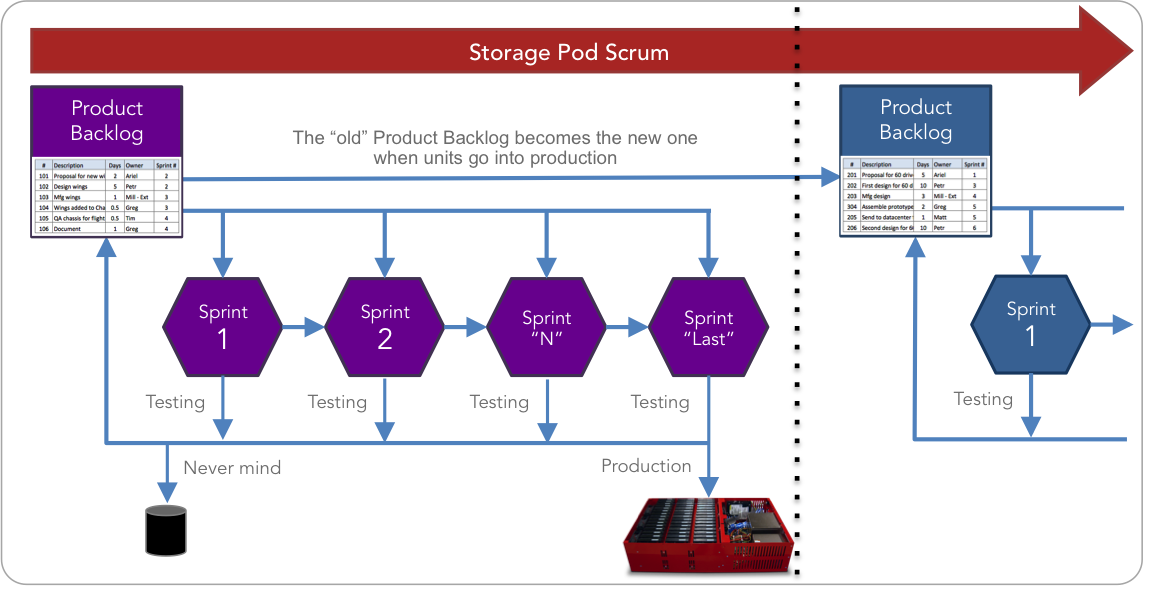
The Storage Pod Scrum is intended to continue even after we have placed Storage Pods into production. We start with a product backlog, build, and test a number of prototypes and then go into production with a feature complete, tested unit. At that point, any new ideas generated along the way would then be added to the product backlog and the sprints for the next Storage Pod production unit would begin.
Will the ongoing Storage Pod Scrum last forever? We started the Scrum with the intention of continuing as long as one or more of the following are being accomplished:
- We are improving product reliability
- We are reducing the manufacturing cost
- We are reducing the assembly cost
- We are reducing the maintenance cost
- We are reducing the operating cost
The Next Storage Pod: Not Yet
Where are we in the process of creating the next Storage Pod version to open-source? We’re not done yet. We have a handful of one-off Pods in testing right now and we’ve worked through most of the major features in the product backlog, so we’re close.
In the meantime, if you need a Storage Pod or you’re just curious, you can check out https://www.backblaze.com/cloud-storage/resources/storage-pod. There you can learn all about Storage Pods, including their history, the Storage Pod ecosystem, how to build or buy your very own Storage Pod and much more.